Monday, September 30, 2013

Breaking Thai

What better way to end a really great weekend, than with a delicious home cooked meal and watching the series finale of an amazing TV show? Well, that was my ideal this past weekend. I celebrated my dad's birthday on Saturday (with a fiesta and homemade margaritas!); brunched at an Irish festival in Annapolis with my friend Erica and our pups; then came home and cooked this rich and savory meal for myself and my friend, and fellow Breaking Bad enthusiast, Paloma. We needed some comforting food to help us make it through the stress of the finale!

When I invited Paloma over for dinner, I asked her if she was doing any special diets or had any food restrictions. She said she was avoiding gluten and dairy, but that I didn't have to work within those parameters. But you know me, I love a culinary challenge! Paloma is always down to eat a vegetarian meal, so I knew our dinner would also be vegetarian (though some shredded chicken or beef would probably be good in this recipe if you're a meat eater). I decided I would try to figure out a recipe that would also be gluten and dairy free. I knew I could come up with something that met all of these requirements, but was still filling, tasty, and satisfying.

I thought of using a vegetable as a roll and then stuffing it with other veggies. Then my mind wandered to my recent love affair with panang curry. It all started on a work trip to California where the neighborhood Thai restaurant was everyone's favorite. That was the first time I tried panang and have been in love with it ever since. I order it at my local Thai restaurant and also happened to have it last week at my boss's birthday lunch, so it was fresh in my mind when trying to come up with this vegetarian, gluten & dairy free meal. I thought I could make the panang at home and use that as the sauce for my veggie roll-ups. I would usually do an Italian style tomato sauce, but figured I should venture out and try something different this time, and that is what I did!

I made the rest of the recipe Thai-inspired as well, as far as the oil for frying the eggplant and the seasoning for the veggies. To keep it gluten-free, I decided to serve this along with some quinoa instead of the traditional jasmine rice I get at Thai restaurants. I obviously don't know how to make panang from scratch, so I did have to use a recipe for that. The one I used turned out to be really tasty, so I would recommend it.

This recipe definitely did the trick for holding our hands through the finale of Breaking Bad. And although we no longer have Walt, Saul, or Jesse, we will always have this recipe! haha

Milli was so exhausted from our fun weekend that she couldn't even bring herself to play when Paloma showed up! I caught her passed out on the couch, barely able to keep her eyes open:
When this puppy is too tired to play, you know it was a good weekend!

OK, let's get cookin' (this recipe, not meth...;-)!

Eggplant Roll-Ups
Servings: 2
Prep time: 20 minutes (this includes the time it takes to make the panang sauce)
Cooking time: 45 minutes

Ingredients:
1/2 large eggplant, cut into long, quarter inch thick strips
7 teaspoons peanut oil (or sesame oil if you're allergic to peanuts)
1 white potato, diced
2 handfuls cauliflower florets, chopped
1 beefsteak tomato, diced in large chunks
1/4 yellow onion, diced
1/4 teaspoon salt
1 rounded teaspoon ground coriander
1 cup prepared (uncooked) panang curry sauce
3 large Thai sweet basil leaves, julienned

Preheat your oven to 375 degrees Fahrenheit.

First, make the panang sauce and set that aside until you're ready to use it.

Next, place a Dutch oven or a pan with high sides on the stove over medium-low heat. Drizzle in 3 teaspoons of peanut oil.

Add the diced potatoes, toss to coat them in the oil, and allow them to cook for about three minutes.
Next, add the cauliflower and mix with the potatoes and oil. Let them cook for three minutes.
Add the diced onion, toss. Cook for another three minutes.

Sprinkle in the 1/4 teaspoon of salt and stir.

Throw in the diced tomatoes, sprinkle in the ground coriander, and stir.
Place the lid on the pan and let that cook while you are frying the eggplant. Just remember to stir every few minutes so nothing sticks to the bottom of the pan.

Put a stainless steel pan on the stove over medium heat. Add one teaspoon of peanut oil and let that heat up for about five minutes.

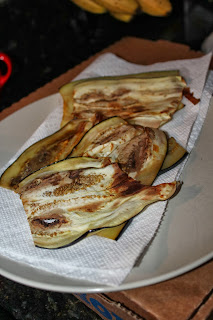
While the oil is heating up, arrange a paper towel over a dinner plate. You will use this to drain the eggplant when it's done frying.

When the oil is hot, distribute it evenly throughout the pan. Add two strips of eggplant.
Let them cook on the first side for about a minute, then flip them over to cook on the second side for another minute.

Remove them from the pan and place them on the paper towel plate.

Add another teaspoon of oil to the pan and repeat the frying process with the next two strips of eggplant. Continue doing this until you have fried all of your eggplant.
Now you are ready to assemble the roll-ups.

Remove the lid from the veggie pan and give it a good stir.
 Pour about 3/4 of a cup of panang sauce on the bottom of your baking dish.
Place an eggplant slice on a clean plate, and add a heaping tablespoon of the veggie mixture to the center of the eggplant strip.
Fold over one end of the eggplant strip atop the veggies, then fold over the other end, then roll them over so they are resting on the seam.
Use a spatula to gently pick up the roll and place it seam-down in the sauce inside the baking dish.

Repeat this for the rest of your eggplant strips.
Once all of the roll-ups are arranged in the baking dish, spoon the remaining quarter cup of sauce over the top of the rolls.
Place the baking dish in the oven to cook for a total of twenty-five minutes.

At this point, you can go ahead and start cooking the quinoa. Follow the directions on the box and set aside when it's completely cooked.

After the roll-ups have been cooking for fifteen minutes, open the door and sprinkle the julienned Thai basil over the top of them.
Replace the dish in the oven to finish cooking for the last ten minutes.

When the roll-ups have cooked for twenty-five minutes total, remove the baking dish from the oven.
Place two heaping spoonfuls of quinoa onto the center of your serving plate. Add two to three roll-ups to the top of the quinoa. Spoon additional sauce over the top of the roll-ups and the quinoa (I decorated the plate with the sauce as well, just to be fancy!)
 Serve with a glass of red wine like we did, or a Thai beer, like Singha, and enjoy!
 Salute!

Monday, September 23, 2013

Zucchini Boats

This recipe is an old favorite of mine. I whipped it up on a whim one night a few years ago and it turned out to be so tasty and filling. I made it for my mom as well, and she really liked it so I figured I should share it with my readers!

I've been slightly stressed out lately, and for me, stress comes with poor eating habits due to laziness. After many nights of takeout pizza or Chinese food, I finally had enough and decided to make something healthy for myself. This recipe popped into my mind. And I'm glad it did because it definitely made me feel better and re-energized my desire to be on a healthy eating track.

It's the perfect time of the year to eat zucchini and the night I made this meal happened to be the first day of autumn. I figured this was the perfect mix of a summer time staple (zucchini) and something a little hardier for fall.

I made this recipe for myself only, and if you are making it for one as well, you will have quite a bit of sauce leftover. The amount of sauce in this recipe would make about three to four zucchini, depending on how heavy you spoon the sauce. If you have sauce leftover, it would be great on some pasta another night. At least, that's my plan for the leftovers!

I made this vegetarian since I was making it for myself, but I think it would be good with ground beef or ground sausage. Just brown the meat separately and stir it into the sauce before you spoon the sauce into the zucchini halves. This recipe would actually be great to make both ways: vegetarian and meatatarian (if you will). You could divide the sauce in two and add the meat to only one half of the sauce. I love it when it's that easy :-)

OK, let's get cookin'!

Zucchini Boats
Servings: 1
Prep time: 25 minutes
Cooking time: 53 minutes

Ingredients:
2 teaspoons extra virgin olive oil (EVOO)
1 clove garlic, minced
1/2 sweet onion, chopped
1/8 teaspoon red pepper flakes
1/2 red bell pepper, chopped
1/4 green bell pepper, chopped
1 teaspoon fresh cracked black pepper (FCBP) teaspoon
1/4 teaspoon grey or kosher salt
6 large button mushrooms, chopped
1 14.5 ounce can diced fire roasted tomatoes
1 8 ounce can no salt added plain tomato sauce
1/8 cup red wine (I used Pinot Noir)
1 zucchini
1 handful shredded mozzarella cheese
2 pinches of dried Italian herbs

Preheat your oven to 375 degrees Fahrenheit.

Place a pan with high sides on the stove over medium low heat. Drizzle in 2 teaspoons EVOO and add your minced garlic.
Cook the garlic for two minutes and then add the minced onion to the pan. Stir to coat it in the EVOO.
Sprinkle in the red pepper flakes and stir.

Let the onions cook for about three minutes, and then add the chopped red and green bell peppers.
Add 1/4 teaspoon FCBP and a pinch of salt. Stir.

Allow the onions and peppers to cook for about five minutes.

Add the chopped mushrooms and stir.
Immediately after adding the mushrooms, add the can of fire roasted tomatoes, the tomato sauce, and 1/8 cup of red wine.
Stir to mix the veggies into the sauce.

Turn the heat up to medium and let the sauce bubble away for five minutes. Then reduce the heat to low.

While you are letting the sauce reduce, prepare the zucchini.

Cut the zucchini in half, length-wise.
Then scoop out all of the insides of the zucchini. I did this by slicing down each side with a sharp knife, then using a teaspoon to scoop out the "guts."
Discard the insides of the zucchini.

Place the zucchini halves in a baking dish, cut side up. Drizzle the zucchini with a half a teaspoon of EVOO, and sprinkle with FCBP & a pinch of salt.
Put the baking dish in the oven to cook for twenty minutes.

Stir the tomato & veggie sauce occasionally while the zucchini cooks.

When the twenty minutes is up, remove the baking dish from the oven. Also remove the sauce from the stove and set it next to where you set the zucchini.
Use a spoon to add the tomato & veggie sauce to each half of the zucchini.
Place the baking dish back in the oven for ten minutes.

After ten minutes, remove the baking dish from the oven and turn the oven off. Turn on the broiler.

Sprinkle the cheese evenly over the top of the tomato & veggie sauce.
Place the baking dish under the broiler and allow the cheese to brown for about 3 minutes. Check periodically to ensure that the cheese doesn't burn.

When the cheese is all toasty and brown, remove the baking dish from the oven and turn off the broiler.
Place the zucchini halves on your dinner plate and sprinkle the top of the cheese with the dried Italian herbs.
Add your side dish(es) (I served mine with steamed broccoli!) and enjoy with a glass of the red wine you used to make the sauce.
Salute!

Tuesday, September 10, 2013

Noodle Salad

First of all, I would like to apologize for my absence. I've been having computer issues, but that is somewhat resolved, so I am back at it! Thanks for your patience :-)
On to this week's recipe...

This idea was born out of my love for an Asian-inspired shrimp salad at my neighborhood fancy restaurant, The Carlyle. All of the food at The Carlyle is good, but this is my go-to meal whenever I visit and am in the mood for a full entrĂ©e.  Unless it's brunch. That's a whole other animal!

This was the first salad I ever ate that had noodles in it. Noodles in salad? It works.  I had a hankering for a healthy, light meal after spending the afternoon at the pool this past weekend. Something about baking away in the hot post-Labor Day sun makes me feel light and airy and I wanted to eat something that would keep me feeling like that and not weigh me down. I ran over to the grocery store and purchased some fresh shrimp, avocado, tomatoes, and a red bell pepper. I quickly cooked the shrimp in my cast iron skillet, chopped up the veggies, and threw it all together with some fresh squeezed lime juice. Perfection! The following night I had some of the same ingredients leftover, so I decided to spruce up the prior day's recipe and make it more like my Carlyle salad.

I picked up some more shrimp and some ramen, and decided to use some baby spinach I had laying around from my morning breakfast smoothies so that I could make this a full-on salad. It turned out really well and I'm excited to share this light, healthful, delicious meal with you!

I made this for myself but it would be really easy to multiply the recipe if you're making it for two or more. And if you're not a seafood person, you could either leave the protein out all together, or add grilled chicken breast. It's up to you.

OK, let's get cookin'!


Shrimp & Noodle Salad
Servings: 1
Prep time: 20 minutes
Cooking time: 20 minutes


Ingredients:
1/2 package Ramen noodles, cooked
1 teaspoon Thai sweet chili sauce
1/2 teaspoon low-sodium soy sauce
1 1/4 teaspoon extra virgin olive oil (EVOO)
1/4 pound uncooked shrimp, peeled and deveined
1 teaspoon fresh cracked black pepper (FCBP)
1 large handful baby spinach leaves
1/4 red bell pepper, julienned
1/2 small-ish vine ripened tomato, chopped
1/2 avocado, chopped
1 lime, juiced
1/2 teaspoon peanut oil

Start by cooking the ramen noodles by following the directions on the back of the package - including adding the seasoning packet. When the noodles have cooked and been seasoned, drain the liquid out and set aside half of the noodles in a bowl.
Place the bowl in the fridge so the noodles can cool.
 

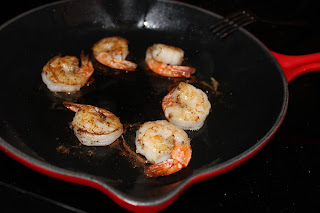
To cook the shrimp, place a cast iron skillet on the stove over medium heat. Add 1 teaspoon EVOO to the pan and spread it around to coat the bottom once the pan starts heating up.
Place the shrimp in a colander and rinse them under some cold water. Shake dry.

Add the shrimp to a small bowl. Sprinkle them with 1/2 teaspoon FCBP and 1/2 teaspoon EVOO. Toss to coat the shrimp.
Place the shrimp in the hot pan, one by one.
(I like my shrimp very well done, but if you're more of a purist and like them a little softer, cook them for less time that I do.)

Allow them to cook for five minutes on the first side, then flip them over to cook for another five minutes on the second side.
After ten minutes, turn the burner off but let the pain remain where it is. Drizzle 1/2 of your lime juice over all of the shrimp and toss with a fork to coat.
Remove the shrimp from the pan and place them somewhere to cool while assemble your salad.
Take the noodle bowl out of the fridge and dress the noodles with the soy sauce and Thai sweet chili sauce. Stir it all together so that the noodles are evenly coated in the dressing. Set aside.
Lay the spinach leaves over the surface of your serving plate.
Next, use a fork to spread the noodles over the spinach leaves.
Add the red bell peppers...
Tomatoes & and avocado on top of the noodles.
Sprinkle the entire salad evenly with 1/2 teaspoon FCBP and drizzle with the peanut oil and the rest of the lime juice.

Last, add your cooked shrimp to the top of the salad in a pretty formation.
If you are serving this salad to guests, leave the salad assembled like this.
If you are eating it more informally, go ahead and remove the tails, chop up the shrimp, and sprinkle them throughout the salad, like so:
Either way, enjoy! Salute!