Tuesday, February 24, 2015

Detox Download

Over the past six months or so, I have shared with you how I have had to change up my eating habits in order to clear up some health issues. Changing my diet has helped my health immensely, but I was recently in need of an extra push to get over a few lingering humps. My doc suggested a combination of three detoxes/cleanses. We created my plan together and implemented it immediately. The plan was a ten day detox, including an elimination diet. It's easier to list the things I could eat, rather than what I couldn't. Yeah. Ugh. I could eat berries, apples, and pears. Low glycemic, non starchy vegetables (think zucchini, celery, greens, cucumber, peppers, etc.). And home-prepared beans. Aaaand that's about it. But you would be surprised what can be done with all of that! I'm sharing one of my favorite recipes with you in my next post - vegan detox chili, so keep an eye out for that. I think you'll like it even if you're not on a detox. Or vegan.

Doing this detox was pretty difficult for me, even though I went into it with a good attitude, feeling I was mentally prepared, having done my reserach beforehand. I wanted to do a different sort of post today and share with you some lessons I learned through the course of the ten days and offer a bit of advice that you may not find elsewhere for those who are thinking of embarking on a detox. Being that this is a food blog, my lessons focus on food. They are definitely things I'm going to keep in mind if I ever do another cleanse. I hope you can take away something that will help you have an easier time on your mission seeking improved health.

VoraceRachel's Detox Download

1. Planning is paramount when it comes to your groceries. Schedule in time to hit the grocery store when you're mapping out your detox plan. Make a list of what you can eat on each day and use that to make your grocery list for each of the days you will be stopping by the market. I went to the store for fresh ingredients three times through the ten day detox, and I wouldn't recommend going more than that. The grocery store is temptation central! The scent of rotisserie chickens wafting through the air (and I don't even eat meat!), the cheese bar that never looked so extensive, and the baking section - just stay clear of there! I had a game plan for the grocery store before I even set food inside: stick to my list and enter the produce section and soup/bean aisle ONLY. Have someone else do the shopping for the rest of the household during this time, unless you truly have nerves of steel. Side note: a second fridge would've been nice to store all of the fresh produce I had around during this time!

Schedule in time to hit the grocery store when you're mapping out your detox plan.

2. Food prep is key. You know that saying, "failing to plan is planning to fail"? That is never truer than when you are doing a detox. Pretty much everything you eat/drink needs to be prepared at home, so making time for food prep needs to be a priority. Otherwise, you will either be going hungry and your body won't be getting the nutrients it needs to carry on with the detox, or you'll be tempted to eat things not on-plan, ruining your progress. Set aside time each day to prepare food to eat or to take with you if you're going out. Make extra so you have back up for snacks and instances when you're short on time.

3. Preparing and cooking healthy food takes the same amount of time as preparing and cooking regular food. Say what?! I don't know about you, but I formerly had this misconception that cooking super healthy food was so time consuming, involved, and difficult. The exact opposite is true. Cooking healthy means you're using pretty simple ingredients: fresh veggies, fruits, and legumes. Chop 'em up, add some seasoning, and voila! A tasty, healthy meal in no time. OK, maybe not 'no time,' some recipes take longer than others - but guess what! That is true of 'regular' recipes as well. Realizing this was a game changer. The bonus is that since I made the same recipes multiple times, I got practice! So going forward, I know that I can quickly whip up a pot of detox veggie soup or vegan chili in under an hour. I definitely plan to incorporate some of the healthy recipes I've learned into my cooking repertoire moving forward - especially the hummus!

I formerly had this misconception that cooking super healthy food was so time consuming, involved, and difficult. The exact opposite is true. 
 
4. Kind of in line with the last lesson, I discovered it's best to stick with one-pot-wonder recipes. When you're detoxing, you get hungry. And you're already dealing with irritability and some other uncomfortable symptoms that come with the territory, especially in the first few days. Cut corners wherever you can! This is the time to be gentle with yourself and be physically lazy while being mentally strong. At least that's how I felt! It makes things a lot easier to throw all of your ingredients in one cooking apparatus and call it a day! The chili recipe I will be sharing is a one-pot-wonder, and so was the hummus I made (food processor), veggie soup (dutch oven), and berry salad (glass storage container).  Cooking all of your food at home creates a lot of dishes, so cut back where you can and give your dishpan hands or trusty dishwasher a break!

5. If grocery stores are temptation central, restaurants are enemy #1. The food there is already prepared or a request away from being prepared for you. The food is just begging you to eat it. Don't put yourself in the position to be tempted or so uncomfortable that you make yourself and everyone around you miserable. My suggestion is to set aside a block of time to complete your cleanse in which you have limited social commitments. I did this and it made things so much easier on myself to not worry about letting anyone down by not attending an event or stressing about being tempted or cranky in the face of an inevitable variety of fried foods and sweets. If you do have to go somewhere that food is involved or the focus, make sure to eat before you go and even bring a plan-friendly snack with you in case you get hungry so that you're not tempted to eat what's being served. Have a meal lined up for when you get home. This is what I did on the day we celebrated my brother's birthday and although I was still a little cranky and jealous of the calamari and sandwiches that were being eaten (oh how I have longed for a sandwich for months now!), it did make it easier to bear since I wasn't really hungry while there.

Don't put yourself in the position to be tempted or so uncomfortable that you make yourself and everyone around you miserable.

6. Healthy, simple food tastes really good. I owe it to this detox that I now have a better appreciation for the sweetness of a perfectly ripe pear, and the tartness of a plump blackberry. Two fruits I've never been gung ho about I now thoroughly enjoy. I don't know if it is the gratefulness I felt to be able to eat anything at all or if it was the clarity of my tastebuds after toxins had been flushed out of my system, but everything I ate tasted pure and delicious. I'll definitely be taking advantage of my new-found love for these fruits when I go back to regular eating and will pick these guys up at the grocery store from now on.

7. Food is comfort. It just is. We have all heard of food addictions, wherein the person uses food to mask their feelings or comfort them when they are feeling all the feels, but even if you don't have a food-related addiction, food is still a comfort. That is human nature and that is something I discovered while doing this detox. The first few days where I could only eat pureed soup and berries, I was an irritable, angry, ragey crankpot. I was that way maybe because of what the detox was bringing up for me, but those feelings were extra intense because I actually had to feel them instead of covering them up with food distractions or comforts, like stuffing my face with an almond butter smothered brown rice cake (my go-to comfort food). Suggestion: think of some non-food related comfort activities you like to do and use them when you're feeling overly irritable during your cleanse. You can't FEEL all of the time, it's OK to distract yourself. My favorite distractions were watching Bravo marathons and taking hot baths while reading a light topic book (The Andy Cohen Diaries was my go-to! I see a Bravo theme here...). 


You can't FEEL all of the time, it's OK to distract yourself.


8. Create a food-related reward for when the detox is over. This one is just for fun. Some background info: I've recently learned that the best way to set yourself up to complete a goal is to have a combination of intrinsic and an extrinsic motivators pushing you along. You have to assess whether you as an individual tend to be intrinsically or extrinsically motivated, then you put some structure around whichever is your unnatural proclivity. When it comes to my health, I tend to be intrinsically motivated, therefore it's helpful to set up a reward for myself that is outside of myself - extrinsic, that way I have a balance and am setting myself up for success. My intrinsic motivation is feeling physically well - that is a reward for me in and of itself. My extrinsic motivation is buying a new purse once the detox is complete! This is where the just-for-fun food reward comes in. Technically, you aren't supposed to have your reward be related to your goal - hence the purse. But dude. I'm giving myself a bonus! My secondary reward is most definitely related to my goal in that it has to do with food! I plan to indulge a little the day after my detox is over and have one of my favorite take-out meals - Naked Pizza. Yum! Now, proceed with caution on this one guys, you don't want to shock your system. If your favorite takeout is Dominos or McDonald's, maybe steer clear of those and find a healthy option that would still be considered a treat considering you just deprived yourself from comfort food for 10+/- days. And just a suggestion, don't think about this until you're towards the end of your detox, otherwise you'll be torturing yourself for days day dreaming about that take-out pot of gold waiting for you at the end of your detox rainbow!
 
Eight happens to be my favorite number, so I think that's a good place to stop. Best wishes to you on your detox endeavors! Check back later for the chili recipe :-) Here's a little preview:


Tuesday, February 03, 2015

The Game Day Vegan

Super Bowl XLIX was this past weekend (Go Patriots!) and my friend Vanessa was hosting a get-together at her home for her and her hubby's football loving friends. Believe it or not, that includes me! I was excited to be rooting on the Patriots from her couch, but as is the norm as of late, I was anxious about the game day eating situation. Along with my no sugar/extremely low carb diet, I have now taken up being vegan as well. That combo: low carb + vegan is a toughie. Especially in social situations and oh, anywhere outside of my house.  But you know I love a good food related challenge, so I decided to try to make something I could eat that everyone else at the party would enjoy as well. Enter the layered dip.

As I've mentioned before, what us Americans consider ethnic food lends itself very well to the vegetarian and even vegan diets. Recipes from cultures the world over feature many more vegetables and grains than do meals made in the typical American fashion. This has been my experience at least. It was pretty easy to take a Mexican-style appetizer and turn it into a hearty, vegan-satisfying dish. That being said, I can definitely give you tips and modifications to turn today's recipe into a meaty-cheesy delight to satisfy your omnivoric ways.  Check the recipe below for those mods.

What's in the standard layered dip? Refried beans, guac, salsa - all kosher on the vegan checklist. Where things get a little dicey is when you start throwing in things like seasoned ground beef, sour cream, and flavored or shredded cheeses. While you can actually have vegan versions of all of those things, which I'm sure would be delicious, I chose to go with some healthier options so that my dip would be tasty, satisfying, AND totally good for you. What a concept!

The great thing about this dish is that you're getting a few recipes in one. The guacamole would be great on it's own with some chips or to top tacos or chimichangas, and the bean and corn salads would make for tasty side dishes. And actually, as a bonus for this post, I'm throwing in a second recipe: a burrito bowl you can make with those salads you'll have extra of after making your dip. Today is your lucky day!

OK, let's get layering and making a dish you can enjoy whether you're watching a game or not!

Five Layer Vegan Dip
Servings: 1 smallish casserole dish
Cooking time: n/a
Prep time: 1 hour

Ingredients:
1 15oz can vegetarian refried beans
1 1/4 teaspoon chili powder
1 teaspoon cumin
3/4 teaspoon smoked paprika
1 teaspoon sea salt
1 1/4 teaspoon fresh cracked black pepper (FCBP)
1/4 teaspoon cayenne
4 avocados, meat only
1/2 15oz can black beans, drained and rinsed
1/2 15oz can kidney beans, drained and rinsed
1/3 15oz can black eyed peas, drained and rinsed
6 teaspoons diced red onion
8 teaspoons diced roasted peppers
4 teaspoons raw apple cider vinegar
12 teaspoons oil from roasted pepper jar
1 15oz can yellow corn kernels, drained
6 teaspoons diced hearts of palm
1 mini can diced green chilis
1 mini can sliced black olives, diced
1/2 handful cilantro - leaves and stems
1 teaspoons chopped cilantro
1 1/2 limes, juice only
1/2 jar/container of your favorite fresh salsa
Corn chips for serving
*Meat & dairy mods at the bottom of this recipe

Start by making the refried beans. Add the beans to a bowl and in one teaspoon of the chili powder, cumin, 1/2 teaspoon of the smoked paprika, 1/4 teaspoon salt, and 1/4 teaspoon FCBP.
 Spoon the beans into the bottom of your casserole dish (you'll want to use one with semi-high sides), starting at one end and then smoothing out as you go. Make sure when you're done that the beans are distributed evenly covering the bottom of the dish.
Next, make the guacamole. Add the avocado meat, a half of a handful of cilantro, the juice of one lime, the garlic powder, four teaspoons of the roasted pepper oil, 1/4 teaspoon salt, and 1/2 teaspoon FCBP to a blender. Turn on the blender to puree the ingredients, stopping to scrape down the sides as necessary.

Blend until the mixture is smooth with few lumps.

Use a spatula to scoop out the guac and layer it on top of the refried beans in your casserole dish, again, starting at one end and spreading it down in an even layer to the other end of the dish. Make sure you're careful not to combine any of the beans with the guac.
Three layers to go!

Now make your bean salad. Add all of the beans to a bowl along with the diced red onion and roasted peppers.

In a separate, small bowl make your dressing. Add the vinegar, 1/4 teaspoon chili powder, and 1/4 teaspoon smoked paprika to the bowl, and use a fork to whisk as you pour in 8 teaspoons of the oil from the roasted red peppers jar.
Drizzle the dressing over the bean salad, sprinkle with 1/4 teaspoon each salt and FRCP, and toss.
Use a large slotted spoon to layer the bean salad onto the guacamole in your casserole dish, starting at one end and spreading it over until you've covered the guacamole. Be careful not to stir up the guac into the beans.
 Two more!

The last thing you'll need to make is the corn salad. Add the drained corn kernels, diced hearts of palm, diced black olives, green chilis, and the chopped cilantro to a bowl. Sprinkle with the juice of half a lime, 1/4 teaspoon salt, and 1/4 teaspoon FCBP and toss.
Use a slotted spoon to add the corn salad to the top of the bean salad in your casserole dish, starting at one end and going until you've covered the beans with corn.
You're almost done!

Last, but not least, use a slotted spoon to spread the pre-made salsa over the dish to completely cover the corn.
Voila! You have a beautiful five layer vegan dip to devour guilt-free!
To serve, I used a spoon to dig in all the way to the bottom to make sure I was getting all five layers at once, plopped it on my plate, and used an all-corn chip to scoop it up and into my big mouth.
 Salute!

*To make this a meat & dairy eater friendly dish, these are my recommended modifications: Take a packet of taco seasoning and mix it into one package of light cream cheese (using a food processor is probably best to accomplish this). Spread that into the dish as your bottom layer.  Top that with the refried beans, then add some seasoned ground beef or turkey as a layer between the beans and the guac. Layer on the bean and corn salads next, spoon on the salsa, and sprinkle with some finely shredded Mexican cheeses. Now you have an impressive EIGHT layer dip! You win!

Bonus! Burrito Bowl
Servings: 1
Cooking time: however long your rice package indicates - mine was about 15 minutes
Prep time: 20 minutes

Apparently I like doing burrito bowls as bonus recipes. (P.S. the salsa included in the recipe from that link would be a great one if you wanted to make the fresh salsa yourself.)

You will likely have some leftover concoctions after you finish constructing your layered dip. I know I did! I used them to create this delicious and healthy burrito bowl the following day for lunch... and dinner... and the following night for dinner again! It's that good.

The true bonus here for our vegetarians and vegans alike is that the combo of beans and rice in this recipe makes for a complete protein. Touchdown!

Ingredients:
1/4 cup brown rice, cooked
2 handfuls baby spinach, shredded
1/2 cup bean salad (from above recipe)
1/4 cup corn salad (from above recipe)
1/4 cup fresh salsa
1 lime wedge
4 teaspoons of this amazing avocado ranch dressing (I subbed Veganaise for the mayo and left out the sour cream)

*Note: As you will see in the pictures, I didn't flavor my rice because I like to make a lot at once, save it, and use it in various dishes throughout the week. However, I suggest seasoning your rice. Use chicken or veggie stock instead of water. Toss 1/4 teaspoon each of chili powder and cumin into the stock, and sprinkle in some chopped fresh cilantro once the rice is done cooking.

Combine the brown rice, spinach, bean salad, corn salad, and salsa in a large salad bowl.
Squeeze the lime juice over the salad.

Drizzle with the avocado ranch dressing and serve immediately.
(Toss to distribute the dressing over the veggies and rice.)

Salute! Again!

Tuesday, December 30, 2014

Guilt Free Peppermint Cocoa

Christmas may be over, but it's technically winter now, which means in most climes the weather has turned chilly (if not freezing cold). There are so many cold weather rituals in which I love to indulge: cozying up on the couch under any number of blankets, drinking hot tea in the morning while getting ready for work, and my new favorite - taking steaming hot baths with epsom salts and essential oils. On a recent chilly night, I enjoyed that last ritual alongside another favorite of mine - a mug full of hot cocoa.  

Since turning sugar free and low carb several months ago, I haven't been able to participate in many of my other favorite rituals, like visiting the local bakeries on the weekends, having that third (or even first) slice of cake at birthday parties, or ordering dessert at restaurants. I'm creating new routines and treats for myself though, and it's been kind of fun trying out sugar & white flour substitutes in regular recipes. I've adjusted recipes from fellow bloggers and come up with some pretty tasty treats thus far: almond butter cups with chocolate almond crusts, salted caramel 'cheesecake' bites (made with cashews instead of cream cheese and homemade Stevia caramel), and sugar free chocolate covered strawberry & coconut butter balls. Yum! Having dessert that's actually nutritious and mostly guilt free is pretty awesome!

Cut to this peppermint hot cocoa recipe I'm sharing with you today. No, I can't have sugar, but yes, I can find a way to make treats I used to enjoy compatible with my new diet. I'm using Stevia a lot for sweetener and I know that unsweetened cocoa is OK for me to eat, and I LOVE peppermint, especially around the holidays, so I threw them all together for the perfect sugar free, non-indulgent indulgence. 

Of course, this recipe would also work if you can have sugar. I would sweeten with agave instead of Stevia and use regular sweetened cocoa. Slowly add the butter & vanilla extracts instead of adding the full amount listed below and taste as you go. And you could use regular milk too of course, but why bother? Almond milk is delicious and adds more flavor, as would coconut milk. 

OK, let's get chocolate-y!

Sugar Free Peppermint Hot Cocoa
Servings: 1
Prep time: n/a
Cooking time: 10 minutes

Ingredients:
1 mug unsweetened vanilla almond milk
1/2 teaspoon peppermint extract
1/4 teaspoon imitation butter extract
1/4 teaspoon alcohol-free vanilla extract
14 drops liquid Stevia
4 tablespoons unsweetened powdered cocoa
1/2 teaspoon Stevia in the Raw
1/8 teaspoon salt

Place a small pot on the stove over medium heat.

Pour the almond milk into the mug you want to drink your cocoa from...
 ...and then pour the almond milk into the small pot.
 Pour all of the extracts and liquid Stevia into the almond milk and stir.
Add the cocoa, Stevia in the Raw, and salt to the almond milk and stir.
Let the hot cocoa heat up for about ten minutes, stirring occasionally.

Pour the hot cocoa into your mug - serve hot. While you take a bath ;-)
Salute!

Blooper:
[Milli couldn't resist the candy cane...]

Monday, December 08, 2014

Sketti Squash & Turkey Balls

Hello everyone! Happy Holidays!

I can't believe it's already the holiday season, but I am very glad it's here! I was excited to go shopping with the boyfriend to get some new holiday decorations for our apartment, and for my very first real Christmas tree on my own - like not with my parents. We went to a quaint farm stand in rural VA...

We even dressed up Milli for our tree hunting excursion;
[She hates getting dressed up!]

She had a blast, sniffing all of the farm smells and meeting new friends.
We picked out a lovely tree, perfect for the little corner we wanted to stand it in:
As much as I'm enjoying the holiday season this year, I like to remember that technically it is still autumn until the 21st of December. With that in mind, I present you with this delicious late-autumn inspired meal.

I picked up a spaghetti squash a couple of weeks ago while I was Thanksgiving meal shopping, and as of last week, had yet to crack that baby open. I finally decided to utilize it for a healthy Wednesday evening dinner. I haven't been eating pasta (for three.long.months.) so I was really looking forward to preparing something that I could at least dress like pasta. I thought about what I would like to toss on some pasta and the first thing that came to mind was pesto. I decided to go the true Italian route and make some turkey meatballs for my boyfriend, as well as some Italian-style falafal for myself.

Let me tell you a tale of some failed falafal. I had this great idea to use navy beans instead of chick peas; basil instead of cilantro. Well the navy beans from a can are much mushier than chick peas from a can, so the mixture turned into more of a hummus/spread vs. a less-creamy dough. I firmed them up with some bread crumbs (which I'm not even supposed to be eating) and they really came together.  Then I royally screwed up by adding them ALL to the oil for frying instead of a few patties at a time. They turned into a big globby mess in the oil, breaking apart and turning into a major FAIL. Ah well, I'm going to try again another time. I've been pretty successful with my blog recipes turning out, so I guess I can take one failure every now and again. Womp womp.

The turkey meatballs, however, turned out fantastically I was told. The phrase, "this is the best meatball I have ever had in my life," was exclaimed more than once, so I'll take that as a win for the night :-)

OK, let's get cooking one last autumn inspired recipe before we really have to give way to winter!

Spaghetti Squash with Turkey Meatballs
Servings: 2
Prep time: 40 minutes
Cooking time: 40 minutes

Ingredients:
1 large spaghetti squash
1 16 oz package grape tomatoes
2 handfuls sliced white mushrooms
2 teaspoons grapeseed or extra virgin olive oil (EVOO)
1 teaspoon kosher or pink Himalayan sea salt
1 teaspoon fresh cracked black pepper (FCBP)
1/4 cup + 2 teaspoons pesto, jarred or homemade
1 lb ground turkey
4 teaspoons fresh minced onion
2 teaspoons chopped parsley
1/4 cup Italian-style bread crumbs
1/8 teaspoon cayenne
3 basil leaves, julienned for garnish

Start by pre-heating your oven to 375 degrees Fahrenheit.

Slice your spaghetti squash around the center in one inch tick rings, as demonstrated here.

Clean the seeds out of the center of the rings and discard.

Spray non-stick oil on a baking sheet (I love Trader Joe's coconut oil spray!), and place the squash rings on it.  You may actually need two baking sheets to fit all of the rings - I did.
Drizzle the squash with grapeseed oil or EVOO, and sprinkle with 1/4 teaspoon salt and FCBP.

Place the squash in the oven to cook for 40 minutes.

Now, prepare your tomatoes and mushrooms.

Add the tomatoes and mushrooms to a medium sized baking dish. Drizzle with grapeseed oil or EVOO, and sprinkle with 1/4 teaspoon each salt and FCBP.
Place in the oven with the squash to cook for the remainder of the time on the squash, about 35 minutes.

For the turkey meatballs, start by setting a non-stick frying pan on the stove over medium heat. Drizzle about 4 teaspoons grapeseed oil or EVOO into the pan. Let the oil heat up while you make the meatballs.

Add the ground turkey, minced onion, parsley, bread crumbs, cayenne, as well as two teaspoons pesto, and 1/2 teaspoon salt and FCBP to a small mixing bowl.
Use your hands to combine all of the ingredients until they are even distributed throughout the meat.

Roll meatballs a little smaller than the size of a golf ball. Place them on a clean plate after making each one.
Once all of the meat has been rolled into balls, add the balls to the frying pan all at the same time so that they are cooking at the same rate.

Fry the balls on the first side for about 30 seconds, then rotate them to the opposite side.
Keep doing this until all of the sides have touched the heat and are browned and crispy.

Once you are done with this, allow the meat balls to sit over the heat while you shake the frying pan regularly to make sure they aren't sitting on one side long enough to get burned. This will allow them to finish cooking internally. The meatballs should be cooking for a total of about 8-10 minutes.

I like to check one of the meatballs before taking them all off the heat, to make sure the inside is thoroughly cooked. Remove one ball from the pan and slice into the center with a knife. If it's at all pink, throw it back in and cook the meatballs for another couple of minutes.

Once the balls are done cooking, remove them from the heat. Set aside while you prepare your spaghetti squash.

When the squash and tomatoes/mushrooms are done cooking, remove the pans from the oven.

Use a fork to go around the center of the squash to pull the strands away from the rind.
You should have nice long strings of squash.
Add 1/4 cup of pesto to a small mixing bowl, and add half of the tomato/mushroom mixture to it along with two rings worth of spaghetti squash.

Toss to spread the pesto over the squash and tomatoes/mushrooms.

Use a fork to twirl sections of the pesto-y squash and tomatoes/mushrooms and place them on your plate. (You can also just spoon the mixture onto the plate, but the twirling just makes it look pretty!)
Add as many meatballs to the top of your spaghetti squash mountain as you like and garnish with your julienned basil.
Serve alongside something green and enjoy!
Salute!


Friday, November 07, 2014

Fall Flavored Crunchy Munch

Autumn keeps chugging along, bringing us luminous sunsets, chilly temps, and rainbow colored trees. In celebration of this beautiful and cozy time of year, I wanted to post another fall-inspired recipe, perfect for entertaining or just keeping around the house for snacking.

I had a few friends over this past weekend and took the opportunity to make this bowl of fun for them to munch on over the several hours we spent together. I hosted this gathering the day after Halloween, so you will notice there is an... um... interesting character present in some of the pictures from an idea I found on Pinterest. And I definitely incorporated the Halloween colors of black & orange into my minimal decorations for girls' night:
[a lil' bar cart styling - notice the bottle of caramel cream I used to make these drinks!]

...but this recipe is not meant to be enjoyed solely around Halloween. I incorporated the quintessential fall sweets - candy corn & candy pumpkins - so that you can make this crunchy munch throughout the autumn season or at any time you can find these fall favs in the stores. Or buy a couple extra bags so you can save them to use throughout the year!

As you know, I enjoy playing around with flavors on popcorn, and the idea behind this recipe is for it to be a spin on the usual caramel (do you say care-a-mel or carmul? I say care-a-mel :-) corn. Adding caramel to salty popcorn not only creates the ever-loved salty/sweet flavor combo, but it makes it a bit hardened, adding that perfect extra crunch. It's an all around winner. Instead of using caramel though, I used maple syrup, another famous fall flavor. With the syrup and the candy already going on, I didn't want to abuse everyone's sweet tooth, so I knew I had to balance out the sweetness with an opposite but complementary flavor or two. Enter cayenne and my buddy: liquid smoke, which you may remember from this old favorite. Spicy and smoky, done and done!

Last but not least, for a final bit of crunch in this munch, pumpkin seeds! My boyfriend and I dressed Milli up in her costume:
[She's a pumpkin! I know she looks miserable, but that's only because... she was miserable! haha]

...and carved pumpkins the evening before my girls' night:
[He carved the ghost and I did the bat. Pretty good, eh?!]

He had the presence of mind to save all of the pumpkin guts, which he diligently went through to dig out all of the seeds, then cleaned them and set them aside for roasting. I 'borrowed' a few handfuls for this recipe and they went magnificently with the rest of the ingredients in the munch.

One last thing before we get started: for some suggestions as to how to modify this recipe for yourself if you are sugar-free like me, check the bottom of the post.

OK, let's get poppin'!

Crunchy Munch
Servings: 1 medium sized bowl
Prep time: 5 minutes + 20 minutes during cooking time
Cooking time: 50 minutes (20 minutes of which are prep time for stuff that isn't getting cooked)

Ingredients:
4 handfuls pumpkin seeds, cleaned and dried
1 1/4 teaspoon salt
1 5/8 teaspoon pumpkin pie seasoning
4 teaspoons + 1/3 cup maple syrup
2 teaspoons oil (I used extra virgin olive oil)
1/2 cup popcorn kernels
1/8 teaspoon liquid smoke
1/16 teaspoon cayenne
1/16 teaspoon cinnamon
2 teaspoons butter
1 bag candy corn
1 bag candy pumpkins

Start by pre-heating your oven to 350 degrees Fahrenheit.

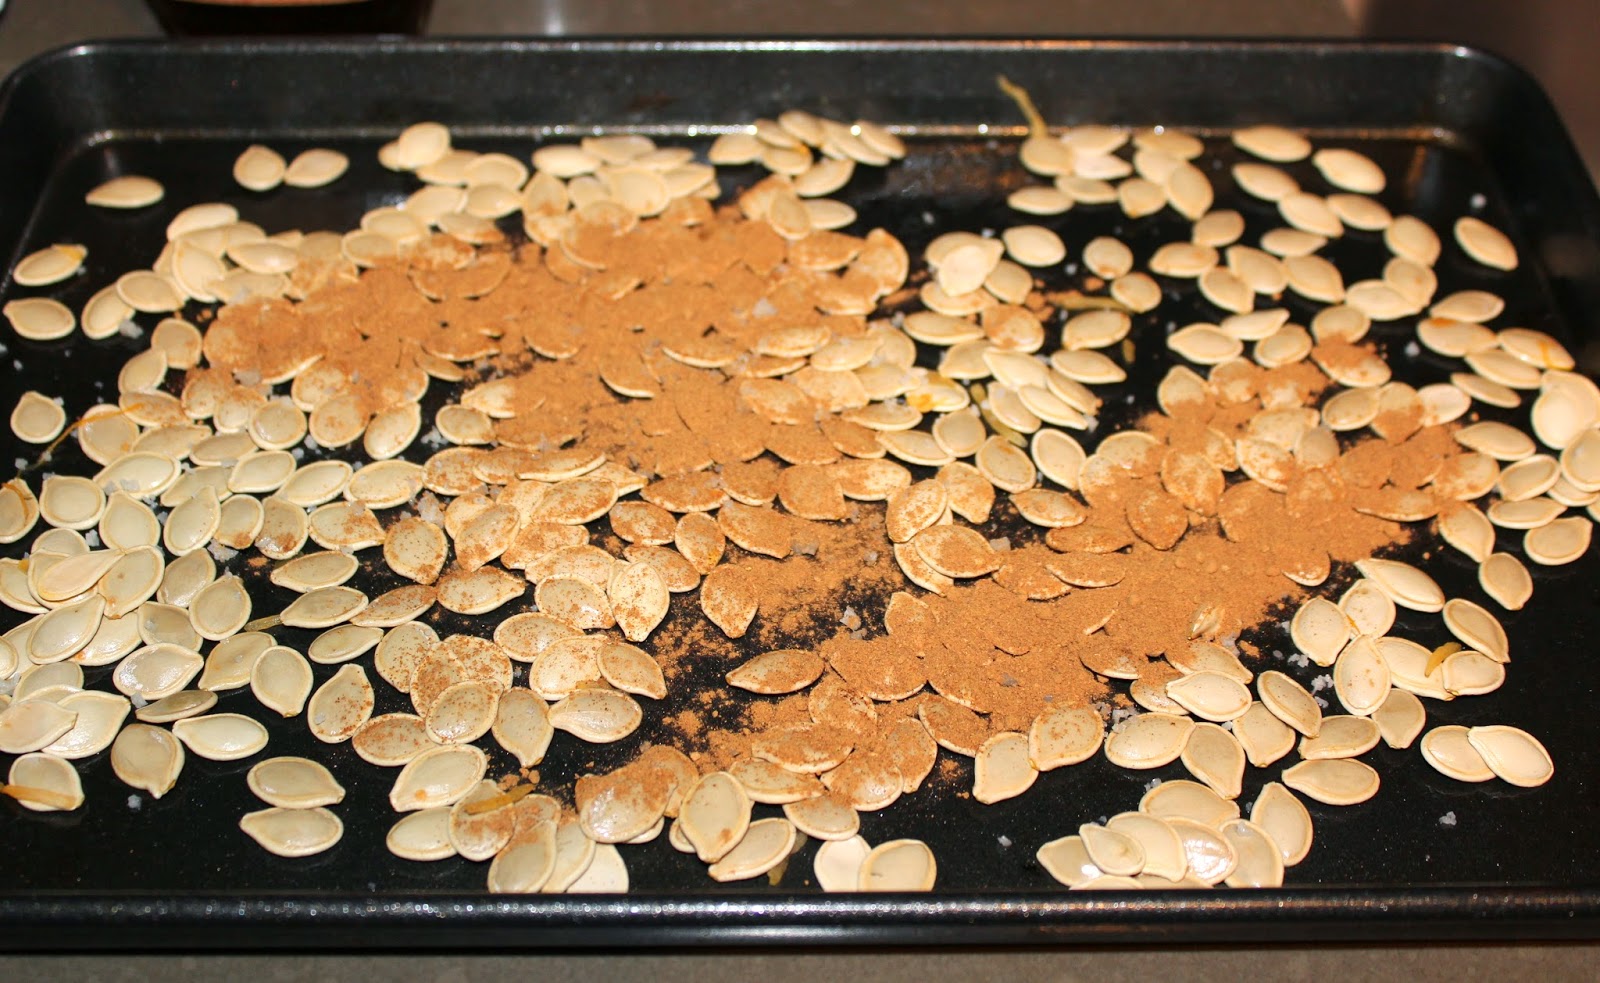
Spread the pumpkin seeds on a nonstick baking sheet.
Sprinkle the seeds with 1/2 teaspoon salt and 1 1/2 teaspoons of the pumpkin pie seasoning.
Toss the seeds to coat in the spices.
Next drizzle four teaspoons of the maple syrup over the seeds and stir them with a spatula.
Place the pan in the oven to roast for 50 minutes. 
When your pumpkin seeds have been roasting in the oven for a half an hour, start making the popcorn.

Pour the oil in a large pot along with the popcorn kernels and place the pot on the stove over medium high heat.
Add a lid to the pot and make sure to give the pot a shake every minute or so before and while the corn starts to pop.

While the corn is popping, make the drizzles, starting with the maple syrup.

Add 1/3 cup of the syrup in a small pot on the stove over medium low heat. Sprinkle in the liquid smoke, cinnamon, cayenne, and 1/8 teaspooon salt. Stir.
Bring this concoction to a light simmer and then turn the heat down to low.
Next, work on the butter drizzle.

Place the butter in a microwave safe dish (or you can go old school and melt the butter on the stove).
Place the butter in the microwave for 45 seconds to melt.
Add 1/8 teaspoon each of salt and the pumpkin pie seasoning and stir.
By this time, five minutes or so should've passed and the corn should be about done popping.

Take the pot off the heat and set aside for 30 seconds to allow any residual popping to cease.

Carefully remove the lid from the pot and use a spatula to give the popcorn a little stir, starting from the bottom to ensure none is stuck or burnt.
Toss the popcorn with 1/2 teaspoon salt.

Next, drizzle the seasoned butter over the popcorn...
...and immediately stir thoroughly with a spatula.
Now drizzle the maple syrup concoction over the popcorn...
...and immediately stir with a spatula so that the popcorn is evenly coated with butter and syrup.

At this time, the 50 minutes on the pumpkin seeds should be up, so remove the pan from the oven and stir the seeds with a spatula.
Throw the seasoned seeds in with the popcorn...
...and toss to combine the seeds throughout the popcorn.
Next, the fun part! The candy! Throw in the candy corn and candy pumpkins and toss.
If you are making this recipe at any time other than Halloween, you will skip this next, most fun step, unless you just have a sick sense of humor and want to do this part anyway.
 
Add a small fake skeleten to the bottom of your serving bowl. (I was thinking a fake severed hand would be fun as well! Or tossing in some fake eyeballs with the popcorn.)
Pour the popcorn in over the skeleten.
He looks ready for the party, doesn't he?!
Serve to your guests with festive servingware and holiday treats, like this delicious pumpkin cheesecake trifle (bottom left) I found on Pinterest!
Salute!

*I made myself a little bowl of crunchy munch, sans candy corns/pumpkins and all of the maple syrup. I roasted some pumpkin seeds without the maple syrup - only salt, pumpkin pie spice, and olive oil. Then for the popcorn coating, I melted coconut oil, added 1/4 teaspoon maple syrup extract, and followed the same cooking method as above for the maple syrup drizzle. I tossed my popcorn in that plus the same melted butter used above, as well as a little salt. Voila! Delicious, sugar free fall flavored crunchy munch!