Tuesday, August 12, 2014

Sun-God Smoked Salmon Plate

This recipe is in honor of my friend, Alexis, who happens to LOVE smoked salmon, and who just gave birth last week to a precious baby boy, named Apollo (the god of light and sun in Greek mythology). She had to abstain from smoked salmon all throughout her pregnancy and is finally able to indulge now that Apollo is here, happy, and healthy. I plan to make this recipe and take it to her on my next visit to see the lil' guy, but I had to do a trial run this past weekend while we were house-sitting for my boyfriend's parents, you know - just to make sure everything tasted alright ;-)

The inspiration for this recipe came from the most fantastic of sources - a local restaurant's brunch menu. My friend Vanessa had been raving about this place for quite some time and suggested we go one weekend when we were making brunch plans. I will be forever in her debt for introducing me to this wonderful brunch menu! Everything was remarkably delicious and five hours after arrival, we had tried nearly everything (some twice!). It's all you can eat for a flat fee - can ya blame us?! One item on the menu really peaked my interest: the 'salmon & dough.' I've always been a little wary of smoked salmon since I actually do not like salmon in general (I know, I'm a weirdo), but Alexis' undying love for it has encouraged me to try it on occasion. I decided to give this one a shot when I saw it on the menu and I am glad I did. This dish has won me over to smoked salmon forever!

I've been wanting to try my own version of the 'salmon & dough' for a while, and I figured Alexis' return to the world of smoked salmon would be the perfect occasion to do so! The restaurant dish actually served their version with ricotta, but I wanted to do something to make the cheese a little more special. Typically, smoked salmon (or lox) is served with cream cheese. The ricotta was really good, but I wanted to do something more like the traditional version, so I chose goat cheese. Plain goat cheese would've been good, but that's too boring for me! I decided to throw in some dill, since dill pairs well with smoked salmon. I think this herb goat cheese really made a difference in this dish and I can't wait for you to try it!

I made this recipe for my boyfriend and me and will be making it again for Alexis, but it would make a really great addition to a brunch table, especially since it's so quick & easy to pull together. If you're serving it for brunch with a larger group, simply use a bigger serving platter and multiply the ingredients for this recipe by half of however many guests will be joining you. (For example, if ten people will be joining, multiply this recipe by five.) And if you're already serving brunch, might as well include one of these old favorites as well! ;-)

OK let's get smokin'!

Smoked Salmon Plate
Servings: 2
Prep time: 20 minutes
Cooking time: n/a

Ingredients:
1/3 cucumber, sliced
2 heaping tablespoons minced red onion
2 tablespoons capers
1 handful salad greens - preferably arugula
2 ounces soft goat cheese - plain
1 teaspoon chopped fresh dill
2 bagels - plain or another savory flavor (I used plain & egg)
2 handfuls bagel crisps, preferably plain
1/4 pound smoked salmon

Start by setting out a serving platter big enough to fit at least some of each of your ingredients. I used a square wooden cutting board, but a flat serving dish would work well, as would a tray filled with ramekins and small dishes for each ingredient.

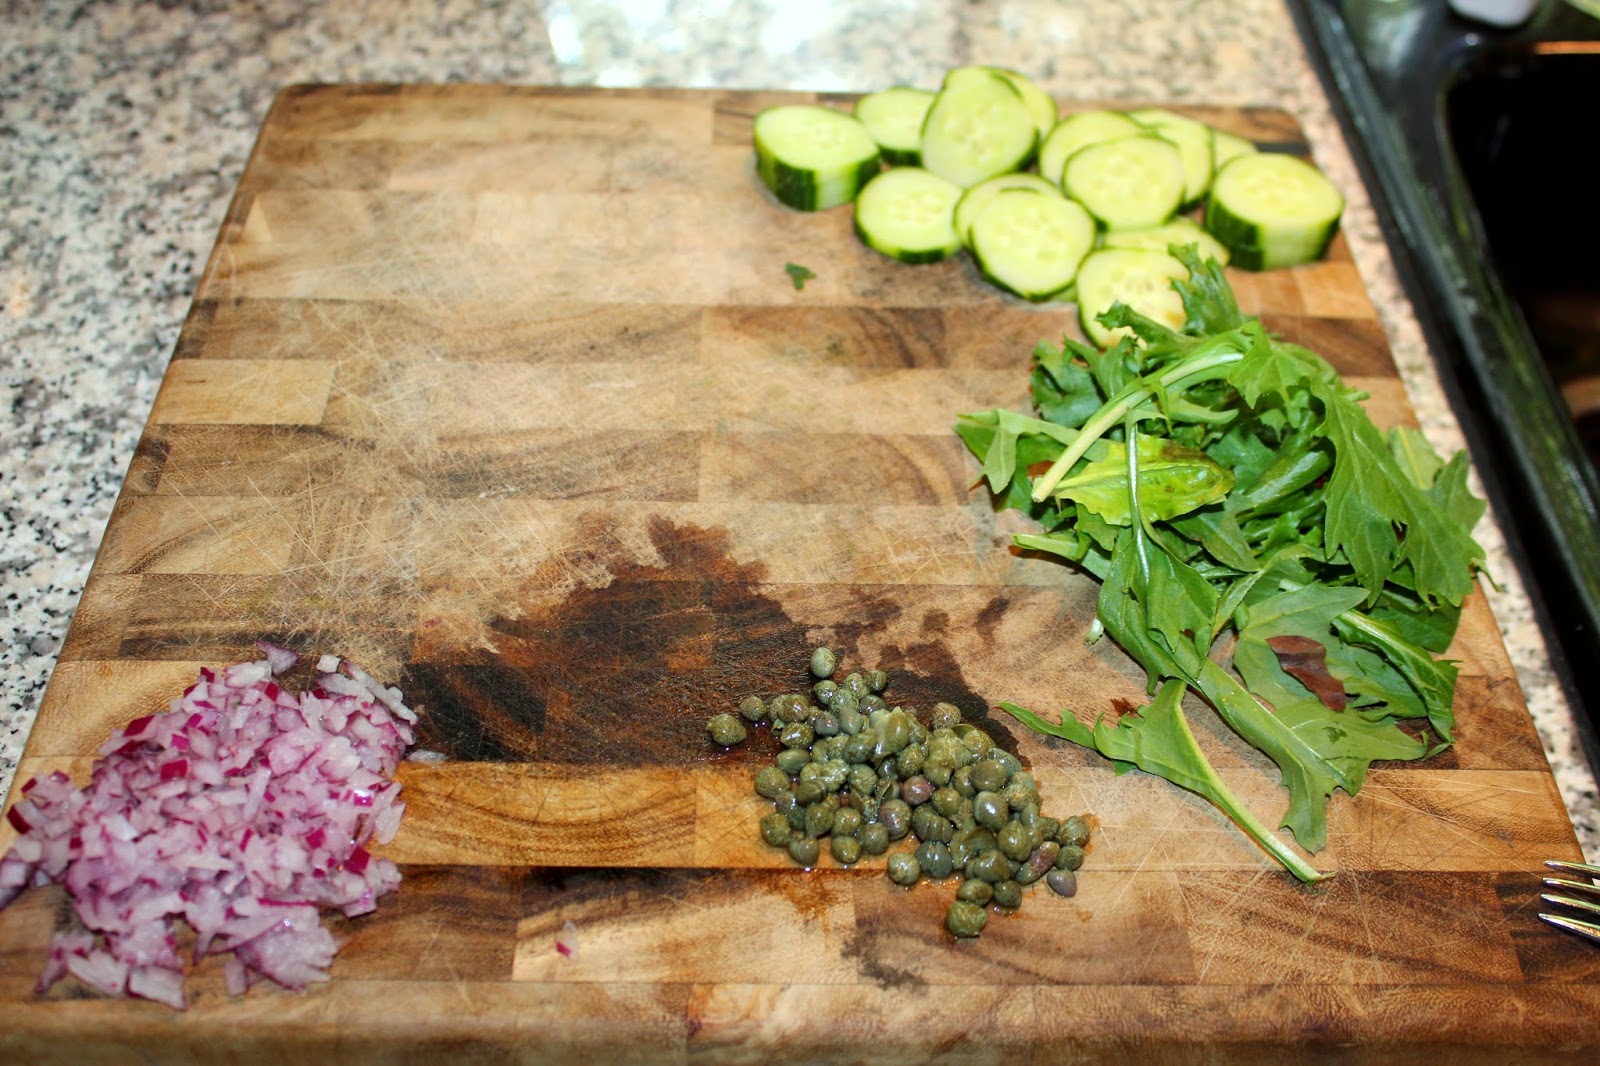
Arrange the minced cucumber slices, red onion, capers, and salad greens on the serving platter in neat little piles. Make sure to leave room for: bread pieces, cheese, bagel crisps, and smoked salmon.
Now, make the herb goat cheese spread.

Place the softened goat cheese in a small mixing bowl, sprinkle in the chopped fresh dill, and stir with a fork to completely incorporate the dill into the cheese.
Use your hands to gather all of the cheese and roll it in your hands to create a patty (kind of like you would do if you were making a hamburger patty).

Lay the herb cheese patty on your serving platter (I pressed the tines of a fork into the center of mine to create a little design for some added fancy!).
Next, tear up the bagels into bite size pieces and place them in a pile on the platter. Arrange the bagel crisps around the cheese patty, leaving room for the salmon slices.
Now you can add the smoked salmon, laying it on the platter where you have left room.
All of your food is now in one place and you can take the entire thing to your serving area.
Set up some forks for serving the capers, onion, salmon, etc. & a knife for spreading the cheese. People can prepare everything themselves and place their bites on individual plates.

Now is the perfect time to pour yourself some prosecco!
To create the perfect bite, simply start with either a slice of cucumber, piece of bagel, or bagel crisp. Spread on the herb goat cheese and sprinkle with some capers and red onion.
Top it with a piece of arugula/salad greens and a slice of smoked salmon.
Sip your prosecco and enjoy!
Salute!

Monday, August 04, 2014

Summer Salad

Summer is in full swing here in the DC metro! We have actually had really beautiful weather this summer with very few scorching hot and humid days, so I am definitely thanking the weather gods this year. But no matter how comfortable the weather, summer still evokes the desire to eat light, fresh, raw ingredients. It just makes you feel good to be one with the season and eat what summer does best: lush produce!

A recent weekend trip to St. Michaels, MD...
 [Milli's first swim in the open water!]

...left my boyfriend and I feeling that we mayyyy have gone a bit overboard in the pigging-out department, and not by indulging so much in the lush summer produce. Well, for me it started with that leisurely day at the pool with Michelle. We drowned ourselves in sangria and then made our way next door to the local watering hole for happy hour, which included various fried foods. Then the boyfriend and I were up and away, where we brunched and supped and gorged on ice cream (twice) and cupcakes. All of this lead to my boyfriend begging for a dinner of "big salad" upon our return, which was very uncharacteristic of him! Our grand plans turned into laziness, as Sundays are wont to provoke, and before we knew it, we had each placed delivery orders. Two.separate.ones. Him Thai, me Indian. Oink, oink.

Those large portions lasted for days until I couldn't take it anymore and vowed to make that "big salad" for dinner so we could finally feel human again. And that's where this little summer beaut comes into play.

While I am a life long salad enthusiast, it's not boyfriend's first inclination. He does enjoy salad, but a specific kind, so I knew I would have to work in some key ingredients to get him fully on board. He likes fruity, nutty, interestingly dressed salads vs. the usual carrot/cuc/tomato/ranch-dressing type. I like to try to work within the parameters of what I think he will like, but still try to come up with something different, and that's what I did this time as well.

The base of any healthful salad is the greens. Spinach is super healthy for you, packed with iron, calcium, and vitamins A, C, E, and K. I like to mix it up a little and toss in some additional greens so keep things interesting. Any fresh fruit you add is going to just kick up the nutritional value even more and nuts are great for protein. Making your own dressing is the best thing you can do. That way you control all of the ingredients and are able to keep your salad on the healthier side. Store bought dressings include so much sugar and who-knows-what. Making dressing at home is fun, first of all, and second, so easy, it's just silly to not do it.

This salad was filling enough for me to eat without any meat protein, but I did include the chicken recipe I made for my boyfriend. The same sauce would probably work over shrimp as well, if you really need something extra but you don't eat meat. Make the sauce the same exact way, coat the shrimp in it, stick the shrimpies on some skewers, and grill 'em up just like we did with the chicken.

P.S. If you're making a list for grocery shopping, make sure to scroll all the way down so you get the ingredients for the chicken, salad, and dressing :-)

OK, let's get cookin'!

Summer Salad

Ingredients:

Chicken
Servings: 1
Prep time: 10 minutes
Cooking time: 17 minutes

3 chicken tenders or one chicken breast
Juice from 1/2 naval orange
Pinch of orange zest
1/8 cup balsamic vinegar
1 rounded teaspoon Dijon mustard
1 teaspoon EVOO
1/4 teaspoon FCBP
1 large pinch salt - kosher or grey

Start by preparing the barbecue sauce for the chicken.

Place a small pot on the stove over medium heat. Add the orange juice and zest along with the balsamic and stir to combine.
 Bring the mixture to a boil and let simmer for two minutes.

Remove the pot from the heat and turn the burner down to low.

Allow the burner to cool before placing the pot back over it.

Let the sauce reduce while you prepare the chicken, about five minutes.

Place the chicken in a food storage bag with tight closure. Use a meat tenderizer to gently pound out the meat.
Open the baggie and pour in the EVOO along with the FCBP and salt.
Seal the baggie and massage the oil and S&P into the chicken with your hands.

Check on the sauce - it should be slightly thickened by this time.
Remove the pot from the heat and stir in the mustard until it is completely combined with the initial sauce.
Open the baggie and pour the sauce over the meat.
Reseal the bag and use your hands to massage the sauce over the meat until all of the tenders are completely coated.
Now you're ready to grill!

Warm up the grill to medium heat. Once the grill is heated, place the chicken on the grate.
Allow to cook on the first side for about five minutes.

Then flip the meat to the second side and allow it to cook there for an additional five minutes.
Remove the meat from the heat (that rhymes!) and place it on a clean plate.

Allow the chicken to cool while preparing the salad.

Salad
Servings: 2
Prep time: 15 minutes
Cooking time: 2 minutes

1/2 bag of pre-washed mixed greens
1/3 bag of pre-washed baby spinach
5 brussel sprouts, shredded
1/3 of a pint of blueberries, washed
Seeds from half of a pomegranate
2 teaspoons extra virgin olive oil (EVOO)
2 handfuls feta cheese
1 handful candied (or not) walnuts

First I want to give a little instruction on two things: shredding the brussel sprouts & prepping the pomegranate.

Brussels: Cut off the stalk-y ends and discard.

Use a sharp knife to run through the sprouts to thinly slice.
Discard any of the thick centers.

Pomegranate: Follow this video.

Now to the recipe!

Place a non-stick pan on the stove over medium heat. Drizzle in the EVOO.
While the oil is heating up, layer two paper towels and place them on a clean plate next to the stove.

Once the oil is hot, add 2 brussel sprouts worth of the shredded sprouts to the pan.
The sprout shreds will begin to brown and crisp quickly, so only leave them in there for about 2 minutes, stirring constantly.
Remove the sprouts from the pan and drain them on the plate covered in paper towels while you prepare the rest of the salad.
Add the mixed greens and spinach to a medium sized salad bowl and toss to combine.
Next, add the shredded brussel sprouts and toss to combine them with the rest of the greens.
Sprinkle the pomegranate seeds...
...and blueberries onto the greens.
Toss to mix the seeds/berries in with the greens.
Now, add the cheese and toss again to spread it throughout the salad.
 Sprinkle the fried brussel sprouts over the salad.
Finally, take the handful of candied walnuts and crush them in your hand before sprinkling them over the salad.
Toss one final time.

Scoop out half of the salad - making sure to get greens as well as all of the goodies - into one serving bowl and do the same with the remaining half.
Make the dressing...

Dressing
Juice from 1/2 naval orange
1/8 cup balsamic vinegar
1/4 cup EVOO
1/4 teaspoon fresh cracked black pepper (FCBP)
Pinch of salt

This is a quick one!

Combine all ingredients in a dressing shaker or a food storage container with a tight fitting lid...
and shake vigorously for 20 seconds.

You should have a well combined dressing ready to pour over your salad.
Drizzle the desired amount of dressing over each serving bowl portion of salad and toss to coat the salad in the dressing.
If you are adding chicken to the salad, now would be the time!

Cut the chicken into bite size pieces on your cutting board...
...and then place the pieces onto the top of your salad.

Stick a fork in it and serve immediately!
 Salute!

Tuesday, July 29, 2014

Poolside Sangria

My first experience with sangria was an eventful one. I was in college and my roomies and I decided to make a pitcher one Saturday night while grilling out at my then boyfriend's apartment. We found a recipe, soaked the fruit in the booze as instructed, poured in the wine, and shoved it in the fridge to chill while we got ready for dinner. Grilling out took a little longer than anticipated (oh, maybe three hours longer) - we didn't have the right charcoal, then we didn't have lighter fluid, and everyone we sent out to remedy these problems took a really long time to complete their mission - so we decided to go ahead and start drinking our sangria. This was a recipe for disaster: empty stomachs + girls who weren't used to drinking wine + hours of sangria consumption/alcohol laden fruit eating = drunken hot mess. Sangria can be dangerous! That was a lesson we had to learn the hard way I suppose, as are most lessons when you're young!

It was quite a few years before I tested the sangria waters again, but being older and wiser, I tested the waters the smart and mature way: Jaleo. If you're going to do sangria, Jaleo is a great place to start! Not to say I haven't had my fair share of let's say interesting occasions while drinking Jaleo sangria (a PG example I can share: my former-co-worker-now-friend and I getting locked out of our office after hours while secretly wrapping the doors in Christmas paper...), but hey at least I knew what I was getting myself into at that point! My love for sangria is undying and I take the chance to indulge in it whenever I can.

My friend Michelle and I shared some pool time at my new abode this past Friday - an indulgent occasion to begin with - so I decided to whip up a batch of my own sangria for a poolside libation. I've made the Jaleo version of red sangria many times and it's always delicious, but I wanted to try something different, lighter, and more refreshing since we would be hanging outside in the sun all day. Jaleo also does a white version of sangria, so that's where I got the idea to do one myself. They use cava or champagne I believe, but I've been really into prosecco lately, so I knew that would be the base for my mix. Usually you soak the fruit in brandy, but I felt that would have too much of an influence on the flavor of our drink, so I chose vodka instead. Sticking with the theme of light and refreshing, I selected tropical fruit, and picked some pineapple sage from our balcony garden to use as opposed to the usual mint. This version turned out really well and we enjoyed almost the entire pitcher while sunning ourselves in the late July heat.

I highly recommend this light, white sangria for your next pool hanging sesh or summertime barbecue. Just make sure you have all of your grilling accoutrement before you start munching the alcohol heavy fruit! ;-)

Before we get started, I must give a shout out to my new favorite grocery store - TRADER JOE'S!! There is one on my new commute home from work, so I stop in as often as I can. When I was concocting this recipe, I was planning to use a papaya. I highly doubted I would be able to find a papaya anywhere, so I had a back up plan (pineapple), but good ol' TJ's came through for me! Not only did they have papayas, they had beautifully ripe papayas that I could use immediately - score! I love when a plan comes together like this! Here are all of the gorgeous fruits I was able to pick up at my local Trader Joe's for this recipe: mango, kiwi, limes, and yes - papaya! 
Let's get drinkin'!

Tropical Poolside Sangria
Servings: 1 pitcher
Prep time: 20 minutes + 2 hours for soaking the fruit in vodka
Cooking time: n/a

Ingredients:
1 mango, skinned and diced
1 kiwi, skinned and chopped
1/2 papaya (prep instructions to follow in recipe)
1/2 lime, sliced into wedges
10 pineapple sage leaves (if you can't find pineapple sage, use 8 leaves of regular sage + a teaspoon of pineapple juice)
1/2 cup vodka
1/4 cup agave nectar
1 bottle prosecco
16 ounces club soda

Start by adding your mango-
... and kiwi fruit to your pitcher:
This was my first time using a papaya and I figure many of you have never prepared one before either, so I want to share how I was able to cut it up for use in my sangria.

First I stood it up on one of the short ends and used a sharp knife to cut through the center, from top to bottom.
I used a spoon to dig out all of the black seeds and discard them in the trash.
I used the same spoon to scrape the fruit from the rind:
I put the strips of flesh on my cutting board and then chopped it up with my knife.

When you're done, add the chunks of papaya fruit to the pitcher with the mango and kiwi.
Next, place the pineapple sage and lime wedges in a shallow glass.
Use a muddler to muddle the lime and sage together, releasing the juice from the limes and the oils from the sage leaves.

Throw the lime & sage concoction into your pitcher.

Next, pour in the vodka and stir.
Place the lid on your pitcher and stick the whole thing in the fridge.
Allow the fruit & sage to soak in the vodka and chill in the fridge for at least two hours before continuing.

After the fruit has marinated for two hours, remove the pitcher from the fridge, take off the lid, and pour in the agave nectar. Stir to combine it with the fruit.

Next, pour in your entire bottle of prosecco.
Stir.
Last, pour in the club soda and stir once more.
Place some ice cubes in a short cocktail glass, then pour sangria into your glass over the ice cubes, allowing fruit and sage to fall into the glass as well.
Add a sprig of fresh sage to the top of your glass for garnish and serve immediately! Salute!