Thursday, February 23, 2012

I Heart Brussel Sprouts!

My veggie obsession as of late would have to be brussel sprouts. I wasn't wise to the brussel sprout for most of my life, as no one in my family cooked or served them, therefore I didn't grow up eating them. Out of ignorance I always bought into the hype, the myth that brussel sprouts taste really gross. When I thought of them, I pictured kids with their noses turned up in disgust, tears streaming down their faces as they begged to be excused from the dinner table so they wouldn't have to eat them. It wasn't until recently - the past three years or so - that I became privy to the wonders of this delicious and healthy cruciferous vegetable when I finally decided to find out for myself what these little leafy mini cabbages were about, and boy am I glad I did!

While I've been eating the b-sprouts for a few years now, I've been going the plain route (boiling - boring!), and have only lately started experimenting. What inspired me to try something different was a show on Food Network (naturally), but I can't recall which one because I watch so many! I'm pretty sure it was "Chopped." If I'm remembering correctly, I think one of the contestants deep-fried them whole and tossed them with some grated parmesan cheese. "Cheese?!" I exclaimed to my boyfriend as I watched. "I bet parmesan would make brussel sprouts taste fantastic!" And with that, this recipe was born.

It's definitely not practical to be deep-frying much of anything. It takes too much oil and it makes your house stink. Plus, I've never been able to get down with the idea of deep frying vegetables. What's the point of eating a vegetable if you're going to suck any nutritional value out it by frying it in a vat of oil? (French fries are my exception to this judgment ;-) Sauteing though... that's a different story. I decided to try sauteing the brussel sprouts in some extra virgin olive oil so that they would retain their color, freshness, and some nutritional value, while still being tasty.

This recipe is so quick and simple, you'll be whipping them up at least once a week. My favorite part is that the outer leaves break off while cooking and end up getting all brown and crispy. They're so sweet, buttery, and nutty - they almost taste like popcorn! With that idea planted firmly in your minds, let's get cookin'!

Sauteed Parmesan Brussel Sprouts
Servings: 2
Prep time: 10 minutes
Cook time: about 13 minutes

Ingredients:
1/2 pound brussel sprouts, washed with outer leaves removed, then cut the head in half
3 tablespoons extra virgin olive oil
1/2 tablespoon fresh cracked black pepper
1/2 tablespoon kosher salt
2 handfuls grated parmesan cheese

Start by heating the olive oil in a skillet over medium heat for about three minutes. Place the halved brussel sprouts in the oil to saute. Immediately add the salt & pepper and stir to coat. Let cook until the sprouts have softened and started to brown, flipping them often so they don't burn on one side.
After about ten minutes, remove from the heat and pour the parmesan cheese over them by the handful.

Stir and serve ASAP!
I hope this recipe opens your eyes to a new and srumptious way to enjoy brussel sprouts, or even to try them for the first time. Salute!


Wednesday, February 15, 2012

Strawberry Surprise!

I was trying to come up with a (somewhat) healthy dessert for my boyfriend and myself as a post-dinner treat on Valentine's Day. The first things to come to mind were strawberries - they're red, very Valentines-y, and they're healthy. Score! And you have to have chocolate on V-Day, right? I mean, what's Valentine's Day without at least a little chocolate? Not a very good Valentine's Day if you ask me! So the obvious choice was chocolate covered strawberries. But that's so boring! "How can I sass it up a little?" I asked myself.

And then it came to me: cayenne pepper! My boyfriend really loves spicy food so I knew he would love the spicy kick at the end of these sweet treats. Plus, both spicy food and chocolate are supposed to release endorphins, which make you happy, and what better day to give the gift of happiness than on Valentine's Day?! The results were amazing and just what I intended: sweetness from the strawberry, richness from the chocolate, and the ZING! from the cayenne at the end. Spicy, but not overly spicy.

You can make these (somewhat) healthy treats any day of the year. Make them as a treat for yourself, for a loved one as a gift, or take them to a party so you can share the love.

Let's get cookin'!

Servings: We're making a dozen of these babies, so however many can eat one dozen chocolate covered strawberries... could be one, could be twelve! We ate about three each.

Prep time: about ten minutes

Cooking time: about an hour and ten minues if you count the time needed for the chocolate to harden before serving

Note: I prefer to use organic strawberries, mostly for the taste - I think they're much sweeter - but also for this reason.

Ingredients:
About a dozen strawberries, more or less depending on their size
3 ounces of dark chocolate chips
1/8 teaspoon ground red pepper (cayenne)
1/8 teaspoon vanilla extract

Create a double boiler (as seen here) to melt the chocolate chips. Turn the burner on medium-low heat. Pour chocolate chips into the bowl while it's heating up over the sauce pan. Stir occasionally with a spatula while the chocolate is melting.

Meanwhile, prepare the strawberries. Wash to make sure all of the dirt is removed from the surface of each berry. Dry off thoroughly with a clean towel and pull up all of the green leaves at the top of the strawberries so that none of the leaves are sticking to the berries, leaving plenty of room for the chocolate coating.

Cover a plate with a piece of wax paper and place the stawberries on top of the paper.

Position the plate in close proximity to the double boiler so you can rest the strawberries on it after you bathe them in the chocolate.

When chocolate is melted and silky smooth, add the ground red pepper and vanilla extract. Stir to combine, making sure the ground red pepper and vanilla are fully incorporated into the chocolate.

Start dipping the strawberries into the chocolate while it is still sitting over the heat. Hold each berry at the top, right under the leaves, and dip into the chocolate, pointy end first, making sure to coat all sides.

Place on the wax paper covered plate, and repeat this process with the remaining strawberries until they are all coated. Place the plate full of chocolate coated berries into the fridge for at least an hour so that the chocolate can harden.

Serve chilled and enjoy with a glass of champagne (and a loved one!). Salute!

Monday, February 06, 2012

Make Your Own "Moose Munch"

For those of you who aren't familiar with my new favorite treat, Moose Munch is sold at Harry & David stores. It's kind of a decandent take on caramel corn and it is just scrumptious! I came across it a couple holiday seasons ago in the form of a candy bar and then this past holiday season in loose bunches, which is what I'm going to teach you how to make. I can't wait to get my hands on this stuff until the holiday season rolls around every year (plus it's WAY cheaper to make it yourself), so I figured I might as well take a shot at making it at home and creating my own DIY recipe. I've made it several times now and it turns out pretty tasty and very similar to the real thing.

It's great to have on hand at parties or to take with you to say, a Super Bowl get-together, which is what I did with it last night. It was a hit with my friends Lauren & Scott, and it's a fav of my boyfriend as well. It contains such a great mix of salty and sweet and you can never go wrong with dark chocolate! It's definitely a crowd-pleaser. One handful of this sweet delight and you will be hooked, so be careful ;-)

Let's get cookin'!

Ingredients:
1/2 cup of popcorn kernels
3 tablespoons olive oil (I used light but you can use extra virgin if that's what you have)
1/3 small jar caramel sauce
1/2 teaspoon kosher salt
1/2 cup dark chocolate chips
1/3 cup chopped pecans (or your favorite nuts - I've used hazelnuts in the past and they work great as well)

Preheat oven to 250 degrees Fahrenheit.

Begin by putting the olive oil in a deep pot on the stove along with the popcorn kernels. Shake the pot a little so that the kernels get coated in the oil.

Place the lid on the pot with a slight space for steam to escape.

Turn the burner on medium heat. Cook until the popping becomes less frequent and then remove from the heat immediately.

While popcorn is popping, line a baking sheet with a sheet of wax paper, as seen below:

Directly after taking the popcorn off the heat, warm the caramel in the microwave for 30 seconds (don't forget to remove the lid first). It should be very liquid-y. Place the popped corn in a large mixing bowl, add the salt and toss. Drizzle the caramel onto the popcorn and stir with a non-stick spoon until all of the popcorn is coated.

Next, spread the caramel-covered popcorn onto the wax paper-lined baking sheet and place in the oven for 30 minutes.

During the last ten minutes of cooking time, start melting the chocolate. Dump the chocolate into a heat-proof bowl with a rounded bottom, preferably metal. You're going to create a double boiler by adding one inch of water to a shallow sauce pan...

...and setting the chocolate-filled metal bowl on top of it so that the bottom of the bowl is barely touching the water.

Place this over medium-low heat, stirring the chocolate often to help it melt. The end result should be melted, silky smooth chocolate.

While the chocolate is melting, let's do a little prep work. Cut two sheets of wax paper and lay them, overlapping in the middle, on an empty counter.

The caramel corn should be done cooking by now. Take it out of the oven and transfer it from the baking sheet to the two sheets of wax paper you laid out on the counter, using a spatula to do so.

Add the pecans at this time and mix in with the caramel corn. Then, drizzle the mixture with the melted chocolate, either directly from the bowl or by using a spoon. (No one here will judge you for licking the bowl or spoon when you're done!)

Mix with a non-stick spatula until all the popcorn and nuts are coated. This is a messy endeavor, so just embrace it!

Leave sitting out for about ten minutes. After ten minutes, pick up the wax paper and shake the coated popcorn/nuts into a medium-sized serving bowl.

Put the bowl filled with your homemade Moose Munch into the fridge and let cool for at least one hour so that it can harden into clusters. After one hour is up, enjoy by the handful and don't forget to share!


I hope you enjoy this recipe as much as I am - right now - sitting at my desk eating it as I type! :-)

Salute!

Wednesday, February 01, 2012

:-) Happy Hour at Home :-)

I love to entertain at home! It's one of my favorite things to do. I love getting the house looking nice, creating a fun playlist on iTunes, and feeding people I care about food I've prepared (mostly) myself. I decided to host a couple friends recently for a happy hour at my home. I feel like that's a great way to save money and puts you in a more laid-back, comfortable mood at the end of a work day. One of my favorite guilty pleasures is the French fry, so I figured what better way to indulge than a happy hour focused around fries?! And potatoes are super cheap, so these recipes also play into my money-saving theme. I think any of these recipes would also work great for a football get-together - or ahem - a Super Bowl party (go Patriots!!). Especially the Buff Fries!

I've learned that the key to any good home entertainment sesh is preparation. Preparing certain components ahead of time will save you stress and give you extra time to enjoy with your guests. For this menu, I suggest preparing the homemade ketchup and freezing the juice for the margaritas far in advance of your guests arriving.

It's always nice to get a good mise-en-place (French for "putting in place" - basically getting everything chopped or measured out before you start cooking) going as well. If you plan on making and serving two or all three of these delicious fry recipes at the same time, I suggest peeling and chopping all of the potatoes at once before you start putting together the recipes. That way they can all cook at the same time and will be ready to serve when your guests arrive, ravenous after a hard day's work.

We're gonna start with a little of that prep work I was talking about.

You want to get your three serving glasses ready first so that they're waiting for you when you take the fries out of the oven.

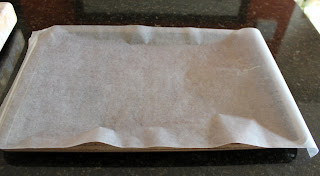
Start by cutting three six-inch pieces of wax paper.

Then, roll the paper into a cone shape.

Place in your serving glass and open up the cone to fill the glass.


Let's get cookin'!

All of these recipes are made to serve four people.
Prep time for each is about 15-20 minutes
Cooking time for each is 40 minutes

HOMEMADE KETCHUP

Ingredients:
1 8oz. can of diced fire-roasted tomatoes
1/4 cup dark brown sugar
1/4 cup apple cider vinegar
1 tablespoon tomato paste
1/4 of a large shallot, minced
1 teaspoon extra virgin olive oil
1/4 teaspoon salt

I served mine warm, but if you want to serve cold, make sure you prepare this at least 3 hours before you're ready to serve. About one hour for prep time, and two hours to chill in the fridge.

Heat the EVOO over medium-high heat. Add minced shallot and cook until translucent, about two minutes. Add the fire-roasted tomatoes, tomato paste, brown sugar, vinegar, salt and simmer, uncovered, for about ten minutes. Then, use a hand-held blender (by placing directly into the sauce pan) to puree all of the ingredients until smooth. (If you do not have a hand-held blender, you can use a regular blender or a food processor. Simply pour the ingredients into the blender/food processor, being careful because it's hot, and blend until smooth. Pour the puree back into the sauce pan and continue cooking.) Let simmer uncovered for about twenty minutes. If you want a thicker, more traditional ketchup, let simmer for one hour. If you do this, make sure to stir often towards the end to prevent the ketchup from burning to the bottom of the pan.

Place in a ramekin and serve with the garlic fries (recipe to follow).


GARLIC FRIES

Ingredients:
2 large baking potatoes, peeled and cut into thin fry slices
4 large garlic cloves, minced
4 tablespoons extra virgin olive oil
S&P to taste

Pre-heat oven to 400 degrees Fahrenheit.

Place the fry slices on a non-stick cooking sheet and toss in 2 tablespoons of the extra virgin olive oil and about 1 teaspoon of salt. Cook in the oven for about 40 minutes, checking on periodically to make sure they don't stick or burn.

Meanwhile, heat the garlic in a sauce pan on the stove in 2 tablespoons of EVOO over medium-low heat until cooked through, but not brown - about three minutes. Remove from the heat.

After the fries are cooked through and crispy, place in a medium-sized mixing bowl and toss with the cooked garlic.

Place fries in the prepared serving cup inside the wax paper. Serve with homemade ketchup.


SWEET POTATO FRIES with CINNAMON HONEY DUNK

Ingredients:
2 large sweet potatoes, peeled and cut into thin fry slices
2 tablespoons extra virgin olive oil
S&P to taste

For the Cinnomon Honey Dunk:
1 ramekin full of honey
1 teaspoon ground cinnamon

Preheat oven to 400 degrees Fahrenheit.

After sweet potatoes are cut into fries, place in an even layer on a non-stick cooking sheet. Drizzle on all of the EVOO and add S&P to taste. Toss with your hands to coat.

Place in the oven for about 40 minutes, checking on and turning over as needed to prevent burning or sticking to the pan. Remove when crispy and fully cooked. Let cool while you prepare the dunk.

Heat the ramekin of honey in the microwave for about 30 seconds. Remove, careful not to let spill on yourself because it will have liquified and become super hot. Stir in the cinnamon.

Place the fries in the prepared serving glass inside of the wax paper. Serve right away.


BUFF FRIES

Ingredients:
2 large baking potatoes, peeled and cut into thin fry slices
1 cup store-bought Buffalo sauce (I like Moore's Buffalo Wing Sauce, but any brand will do)

Pre-heat oven to 400 degrees Fahrenheit.

After potatoes are sliced, place in a medium-sized mixing bowl. Drizzle with half a cup of the Buffalo sauce and toss with your hands to coat the potatoes. Place on a non-stick cooking sheet and put in the oven to cook for about 40 minutes. Check on them periodically and turn over as needed.

When somewhat crispy and fully cooked through, remove from oven and place back in the mixing bowl. Pour the remaining half cup Buffalo sauce over the fries and toss with a spatula.

Place in the prepared serving glass. Serve with your favorite store-bought ranch or blue cheese dressing.


My friend, Natalie, wanted me to note that these also taste really nice paired with a glass of white Bordeaux ;-)


Party time!
CRANBERRY MARGARITAS

Ingredients:
48 oz. cranberry juice (which is 3/4 of a standard 64 oz. bottle)
1 can lemon-lime soda (I used Sun Drop)
1/2 cup silver tequila
1 lime, cut in half. Half used for juice, half cut into four wedges for garnish.
1/2 cup sugar
1 teaspoon "Red Crystal Decos" - basically red sprinkles

Start at least two hours ahead of serving time by freezing the cranberry juice. I did this by pouring it into two freezer safe sealable sandwich baggies and placing them in the freezer. This shouldn't really freeze the juice solid, but get it super cold and slightly slushy. Keep checking to make sure it's not freezing solid. If it's getting like that, remove immediately.

About ten minutes before taking the juice out of the freezer, garnish your margarita glasses. Pour the sugar onto a small salad plate and mix in the red sprinkles. Slice each lime in the center and use that to wipe around the rim of the glasses. Then, dip the rims one by one into the sugar mixture, making sure you get the whole rim covered. Last, slip your lime wedges onto the rim of each glass as a garnish.

Now you're ready to make the margs!

Take the slushy juice out of the freezer and pour into a pitcher. Add the soda, the juice of 1/2 the lime, tequila and stir.

Pour each portion into a shaker and gently shake. (Be careful to not shake too enthusiastically, as the carbonation from the soda will pop the lid off the shaker and you will have a mess and one less glass of margarita! I had to learn this lesson the hard way!) Pour the mix into your sugar-rimmed margarita glasses and serve right away! Your guests are thirsty!


I hope you have a great happy hour and enjoy all of these recipes as much as my friends and I did!

Salute!