Boy, have I been eating poorly lately! And by "poorly" I mean pizza, pasta, ice cream... everyday. For like four days. OK, six days. Understandably, I decided I needed a little detox. I was craving some good, healthy veggies in my diet and these two recipes were my saviors.
I have been making both of these recipes since I was in college (so for like eight or nine years if you're counting) and they are my go-to easy side dishes. The potatoes are great any time of year, but the green beans I especially like in the warm months, hence why they came to mind to make now.
My boyfriend needed a little something extra, so he made some chicken and I think both of these recipes are great side dishes for a simply seasoned chicken breast. They'd also go great with a grilled steak in the summer time, or a nice hearty piece of white fish. Oh... and they also pair nicely with a cold glass of sauvignon blanc, which I know from personal experience! ;-)
In any case, these are simple, quick to prepare, but still very tasty side dishes. I know because the boyfriend kept commenting on how good everything was while he was eating it and thanked me for dinner several times! I'm hoping you feel the same way about them.
Let's get cookin'!
Up first...
Roasted Herb Potatoes
Servings: 2
Prep time: 10 minutes
Cooking time: 25 minutes
Ingredients:
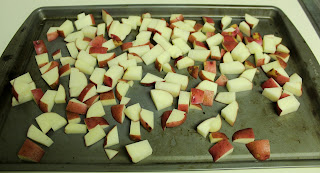
4 red skinned potatoes, diced
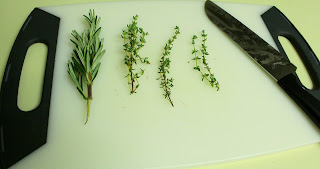
1 sprig of rosemary, finely chopped
4 sprigs of thyme, finely chopped
3 tablespoons extra virgin olive oil
1/4 teaspoon fresh cracked black pepper
1/4 teaspoon sea salt
Preheat oven to 400 degrees Fahrenheit.
Spread out the diced potatoes over a baking sheet.
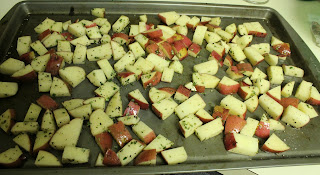
Drizzle them with the EVOO and sprinkle with the rosemary, thyme, salt, and pepper. Make sure your hands are clean and then toss the potatoes (with your clean hands) to coat them in the olive oil and herbs. When you're done, make sure that the potatoes are evenly spread out over the baking sheet once again.
Place the baking sheet in the oven on the middle rack. You're going to let them cook for 25 minutes total, but during that time you're going to flip them over every five minutes so that they cook evenly and don't burn on any one side.
After they have cooked for 25 minutes (and you've flipped them over every five minutes throughout), they should be crispy, golden brown, but still moist and not dried out. Remove them from the oven and place directly on your serving plates, alongside some lemon-garlic green beans (recipe to follow).
Lemon-Garlic Green Beans
Servings: 2
Prep time: 10 minutes
Cooking time: 17 minutes
Ingredients:
1/2 pound fresh green beans, ends trimmed
1 teaspoon extra virgin olive oil
1 teaspoon minced garlic (about 3 cloves)
1/3 lemon, cut into two wedges
Salt & pepper to taste
Note: If you're making these to go with the herb potatoes, save some time and cook them while you're roasting the potatoes in the oven. Start the beans when there are about fifteen minutes left in the cooking time of the potatoes and then they will both be ready around the same time. Then there's no waiting to eat, everything stays warm, and if you have a guest (or guests) over, you'll look like a cooking genius!
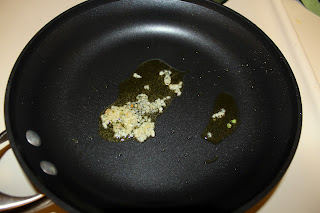
Warm the EVOO in a medium sized skillet over medium-low heat. Add the garlic and let that saute for about two minutes, watching to make sure it doesn't burn or start browning.
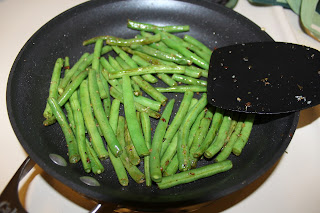
Add the green beans to the skillet, sprinkle with the salt and pepper, and toss to coat them in the oil and garlic. Allow to cook for about five minutes, occasionally stirring.
Squeeze one lemon wedge over the beans, cut side up to make sure no seeds fall in. Toss the green beans so that they're covered in the juice.
Reduce the heat to low and allow to cook for another five minutes. Squeeze the second lemon wedge over the pan (cut side up again!), tossing the beans in the liquid.
Cook for five more minutes, still over low heat. Remove from the pan and place the beans on your serving dish. I served them with the herb potatoes and a lightly dressed mixed greens salad for a light, healthy dinner. Salute!
Thursday, April 26, 2012
Monday, April 16, 2012
Buff ' Boys
As I mentioned in my very first post, I am a lacto-ovo pescetarian (even though I never refer to myself as that because it sounds so hoity toity and pretentious. I just say I'm a vegetarian and leave it at that.), and therefore I occasionally eat seafood. I don't really like that much seafood, but I do like shrimp. Spiced shrimp, fried shrimp, shrimp kabobs, shrimp scampi, shrimp in salad, shrimp on pasta, shrimp tempura sushi, shrimp po'boys... OK enough of my Bubba Gump-like tangent. You get the point: this girl enjoys some shrimp!
Speaking of po'boys - they are one of my favorite ways to eat shrimp. I get so excited when I see it on a menu in a restaurant because I love them so much! My favorite one is on the lunch menu at our local McCormick & Schmicks and I have to say, even though they are not a Louisiana-style restaurant, they know how to do a po' boy up right! The remoulade sauce, the crispy fried shrimp, the toasty bread, fresh tomatoes and crunchy lettuce. Hell.Yeah.
I decided to take this idea of a po'boy and run with it. My FAVORITE favorite kind of shrimp are buffalo shrimp. I discovered these fantastic buffalo shrimp at a local restaurant called The Fish Market, and honestly it was love at first sight. The first time I had them I got two orders, they were so good! Anyways, they gave me the idea to try and make my own at home. I made them and they turned out sooo tasty that I wanted to use them in my own version of a po'boy... or as I like to call it, a buff'boy. And that is the recipe I am sharing with you today, you lucky ducks!
Instead of the remoulade sauce used on a traditional po'boy, I wanted to use blue cheese dressing of course, because that is the best thing in which to dip buffalo shrimp. Duh. No brainer. (I used store bought to save time. Don't judge me!) My boyfriend doesn't care for blue cheese, so he had the idea to make a different sauce out of sour cream for his sandwich. That is why you will see two different sauces for this recipe. Use whichever one you prefer. (Go for the blue cheese!) Or hey - you could even use a ranch dressing.
I used store bought buffalo sauce this time, but I promise I am going to come up with my own recipe for it eventually and share it with you. I just need time!
OK, the wait is over, let's get cookin'!
Buff ' Boys
Ingredients:
1 pound of medium size, peeled, deveined, uncooked shrimp
1 1/2 cup all purpose flour
1/2 teaspoon fresh black pepper
1/2 teaspoon onion powder
1/4 teaspoon ground red pepper (cayenne)
1/4 teaspoon cumin powder
1/4 teaspoon Caribbean seasoning (if you can't find that, just throw in some garlic powder to substitute)
24 ounces, or one small bottle, of oil for frying. I used a blend of canola, soy, and olive but you can use whatever - like vegetable or conola
3/4 cup buffalo sauce
4 teaspoons sour cream
2 sub rolls
6 big leaves of lettuce
2 tablespoons blue cheese dressing
Preheat your oven to 300 degrees Fahrenheit.
To start, get a large ziplock baggie ready to fill with the flour coating. Add the flour, pepper, cayenne, cumin, onion powder, and caribbean seasoning to the baggie. Close the bag securely and shake so that all the seasonings get mixed together evenly. Set aside.
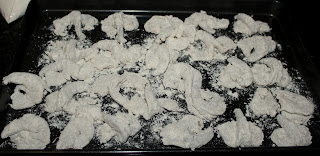
Place the shrimp in a colander and rinse under cool water. One by one, cut the shrimp by slicing them down the center on their backs, cutting all the way through. Make sure to leave the tail in tact. They should look like this:
After you cut the shrimp, place them in the bag with the flour combo. Once all of the shrimp are in the mixture, close the bag and shake to coat them in the flour.
Remove the shrimp one by one and place them, sprawled out, on a baking sheet or large plate - something that will fit in your fridge. Once they're all set up, place the sheet/plate in the fridge to chill for ten minutes.
Take advantage of the time while the shrimp are chilling to make the condiment sauce, to prepare the bread for toasting and the oil for frying. To make the sauce, scoop 4 teaspoons of sour cream into a bowl. Add 2 teaspoons of the buffalo sauce and stir to thoroughly combine. Set aside unitl you're ready to put together the sandwich.
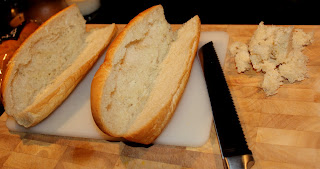
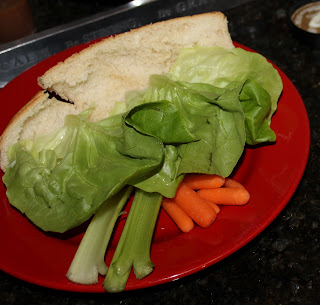
Now the bread: Slice each sub rool down the center, long ways, making sure you don't cut all the way through. Pick out the stuffing of the bread from one side of the roll and discard.
Place in the oven to toast for three to five minutes, depending on how crispy you want it. Keep in longer if you want it really crispy, shorter if you just want it lightly toasted. Remove and set aside to cool while you finish cooking.
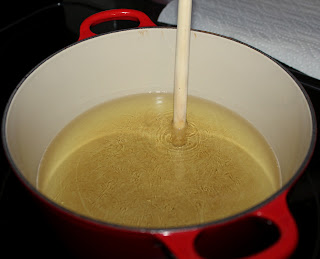
Prepare the oil for frying. Place all 24 ounces of oil in a large, deep Dutch oven or pot - whatever you have that is going to leave at least three inches from the top of the oil to the rim of the pot - over medium high heat. To check if the oil is ready to use, place a wooden spoon in the pot, allowing it to touch the bottom. If there are bubbles streaming off the spoon at a rapid pace, it's ready to use. We have Rachael Ray to thank for that nifty trick!
Take the shrimp out of the fridge and place them in the oil in batches of eight. Use metal tongs to stir them, turning them over in the oil periodically.
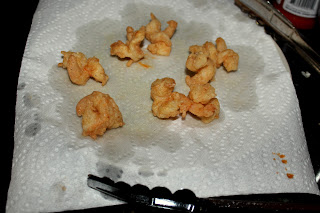
I like a nice, light colored crisp on them, so I leave them in for just three or four minutes. Remove from the oil using the tongs and drain the oil off by placing the fried shrimp on a plate covered with a paper towel.
Once the oil is drained off, place the shrimp in a bowl and toss with about 2 tablespoons of buffalo sauce.
Remove promptly and place them on a clean plate. Repeat this process for each batch of shrimp.
To assemble the sandwiches, spoon the sauce you made onto one of the rolls and the blue cheese dressing on to the other roll - on the flat sides.
Next, lay down the lettuce leaves (three per sami) on top of the sauce, overlapping them a little.
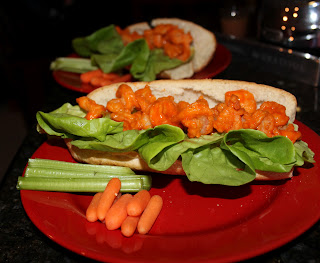
Last, place a couple handfuls of buffalo shrimp into the scooped-out side of the roll. Fold over and serve with a side of celery sticks and baby carrots. Salute!
>Here's an eating tip for ya, courtesy of my boyfriend, Travis: Take the edges of the lettuce that are sticking out the sides, fold them over the shrimp and tuck them in under the bread. This helps the shrimp stay in and not fall out when you take bites.
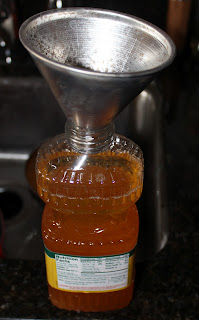
>>Here's another tip for you! I used to avoid frying stuff because of the mess it makes. It was always a struggle to figure out what to do with the oil when you're done frying. You can't dump it down the sink and it's not like you're going to save it to use again (ew!), so what to do? I was at a loss until I bought my little friend, the funnel. Now I just save the bottle the oil came in, put the funnel in the mouth of the bottle, and once the oil has cooled to room temperature, I carefully dump the oil from the pot into the funnel and back into the bottle. Then you just throw the oil filled bottle away. Problem solved. Easy as that!
Speaking of po'boys - they are one of my favorite ways to eat shrimp. I get so excited when I see it on a menu in a restaurant because I love them so much! My favorite one is on the lunch menu at our local McCormick & Schmicks and I have to say, even though they are not a Louisiana-style restaurant, they know how to do a po' boy up right! The remoulade sauce, the crispy fried shrimp, the toasty bread, fresh tomatoes and crunchy lettuce. Hell.Yeah.
I decided to take this idea of a po'boy and run with it. My FAVORITE favorite kind of shrimp are buffalo shrimp. I discovered these fantastic buffalo shrimp at a local restaurant called The Fish Market, and honestly it was love at first sight. The first time I had them I got two orders, they were so good! Anyways, they gave me the idea to try and make my own at home. I made them and they turned out sooo tasty that I wanted to use them in my own version of a po'boy... or as I like to call it, a buff'boy. And that is the recipe I am sharing with you today, you lucky ducks!
Instead of the remoulade sauce used on a traditional po'boy, I wanted to use blue cheese dressing of course, because that is the best thing in which to dip buffalo shrimp. Duh. No brainer. (I used store bought to save time. Don't judge me!) My boyfriend doesn't care for blue cheese, so he had the idea to make a different sauce out of sour cream for his sandwich. That is why you will see two different sauces for this recipe. Use whichever one you prefer. (Go for the blue cheese!) Or hey - you could even use a ranch dressing.
I used store bought buffalo sauce this time, but I promise I am going to come up with my own recipe for it eventually and share it with you. I just need time!
OK, the wait is over, let's get cookin'!
Buff ' Boys
Ingredients:
1 pound of medium size, peeled, deveined, uncooked shrimp
1 1/2 cup all purpose flour
1/2 teaspoon fresh black pepper
1/2 teaspoon onion powder
1/4 teaspoon ground red pepper (cayenne)
1/4 teaspoon cumin powder
1/4 teaspoon Caribbean seasoning (if you can't find that, just throw in some garlic powder to substitute)
24 ounces, or one small bottle, of oil for frying. I used a blend of canola, soy, and olive but you can use whatever - like vegetable or conola
3/4 cup buffalo sauce
4 teaspoons sour cream
2 sub rolls
6 big leaves of lettuce
2 tablespoons blue cheese dressing
Preheat your oven to 300 degrees Fahrenheit.
To start, get a large ziplock baggie ready to fill with the flour coating. Add the flour, pepper, cayenne, cumin, onion powder, and caribbean seasoning to the baggie. Close the bag securely and shake so that all the seasonings get mixed together evenly. Set aside.
Place the shrimp in a colander and rinse under cool water. One by one, cut the shrimp by slicing them down the center on their backs, cutting all the way through. Make sure to leave the tail in tact. They should look like this:
After you cut the shrimp, place them in the bag with the flour combo. Once all of the shrimp are in the mixture, close the bag and shake to coat them in the flour.
Remove the shrimp one by one and place them, sprawled out, on a baking sheet or large plate - something that will fit in your fridge. Once they're all set up, place the sheet/plate in the fridge to chill for ten minutes.
Take advantage of the time while the shrimp are chilling to make the condiment sauce, to prepare the bread for toasting and the oil for frying. To make the sauce, scoop 4 teaspoons of sour cream into a bowl. Add 2 teaspoons of the buffalo sauce and stir to thoroughly combine. Set aside unitl you're ready to put together the sandwich.
Place in the oven to toast for three to five minutes, depending on how crispy you want it. Keep in longer if you want it really crispy, shorter if you just want it lightly toasted. Remove and set aside to cool while you finish cooking.
Prepare the oil for frying. Place all 24 ounces of oil in a large, deep Dutch oven or pot - whatever you have that is going to leave at least three inches from the top of the oil to the rim of the pot - over medium high heat. To check if the oil is ready to use, place a wooden spoon in the pot, allowing it to touch the bottom. If there are bubbles streaming off the spoon at a rapid pace, it's ready to use. We have Rachael Ray to thank for that nifty trick!
Take the shrimp out of the fridge and place them in the oil in batches of eight. Use metal tongs to stir them, turning them over in the oil periodically.
I like a nice, light colored crisp on them, so I leave them in for just three or four minutes. Remove from the oil using the tongs and drain the oil off by placing the fried shrimp on a plate covered with a paper towel.
Once the oil is drained off, place the shrimp in a bowl and toss with about 2 tablespoons of buffalo sauce.
Remove promptly and place them on a clean plate. Repeat this process for each batch of shrimp.
To assemble the sandwiches, spoon the sauce you made onto one of the rolls and the blue cheese dressing on to the other roll - on the flat sides.
Next, lay down the lettuce leaves (three per sami) on top of the sauce, overlapping them a little.
Last, place a couple handfuls of buffalo shrimp into the scooped-out side of the roll. Fold over and serve with a side of celery sticks and baby carrots. Salute!
>Here's an eating tip for ya, courtesy of my boyfriend, Travis: Take the edges of the lettuce that are sticking out the sides, fold them over the shrimp and tuck them in under the bread. This helps the shrimp stay in and not fall out when you take bites.
>>Here's another tip for you! I used to avoid frying stuff because of the mess it makes. It was always a struggle to figure out what to do with the oil when you're done frying. You can't dump it down the sink and it's not like you're going to save it to use again (ew!), so what to do? I was at a loss until I bought my little friend, the funnel. Now I just save the bottle the oil came in, put the funnel in the mouth of the bottle, and once the oil has cooled to room temperature, I carefully dump the oil from the pot into the funnel and back into the bottle. Then you just throw the oil filled bottle away. Problem solved. Easy as that!
Thursday, April 12, 2012
Tea Thyme!
I love me some green tea! Since this past fall I have been drinking it every morning with my breakfast and I definitely miss it if for some reason I don't get to have it. Along with its many other health benefits, it's rich in antioxidants and I truly believe I owe it to my daily dose of green tea that I haven't been sick at all this year (knock on wood!). I always drink it hot but since spring has sprung and the weather has been nice, I wanted to switch it up a little and try something different, something fresh, new. I decided to make a pitcher of iced green tea and spruce it up with one of my favorite flavorful herbs - thyme.
I wanted to add something else though... And what pairs well with thyme? Lemon of course! And with that bright idea, my lemon thyme iced green tea was born.
Something I wanted to point out about this recipe: It doesn't include sugar. When I'm drinking my hot green tea, or any tea for that matter, I never add sugar. Tea has enough flavor on its own so I don't feel the need to add anything to it. I want to appreciate its taste without any interference. Also, while tea is tasty and I enjoy drinking it just because of that, I primarily drink it for its healthiness. So in that case, why ruin the healthiness by adding sugar to it? That makes it kind of unhealthy. Thus you will notice that this recipe does not include any sugar. Aside from the fabulous taste of the green tea, the taste of the lemon and thyme give it extra flavor as well.
I don't think it needs one bit of sugar, but if I haven't convinced you of that and you feel you need sugar, go ahead and add some. Do so when it's still hot so that it can dissolve and not leave any crunchy bits behind. As soon as you take the tea bags out after letting it steep for ten minutes, add the sugar directly into the tea kettle and stir until it's dissolved. Add a little bit at a time so that you can taste it as you go and make sure it's to your liking.
OK let's get brewin'!
Lemon Thyme Iced Green Tea
Servings: 1 pitcher
Prep time: 5 minutes
Cooking time: 15 minutes plus at least an hour of cooling time
Ingredients:
1 tea kettle of water
4 green tea bags
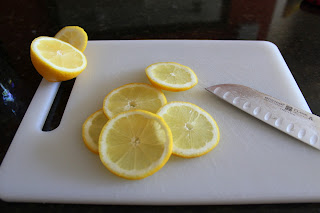
5 slices of lemon, thin
5 sprigs of thyme
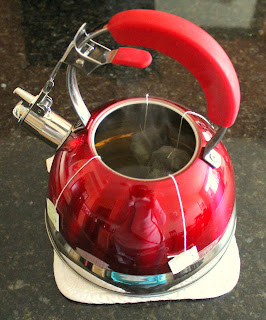
Fill a tea kettle to its max fill line. Place on the stove over high heat. Let go until you hear the whistle. Remove the lid and dunk the four green tea bags into the boiling water. As I've recently been told by at least two different people - green tea turns bitter if you let the tea bags sit in the hot water for too long, so allow it to steep for no longer than ten minutes.
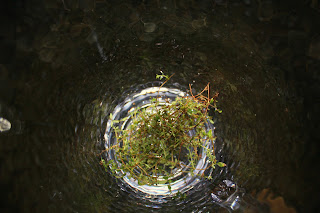
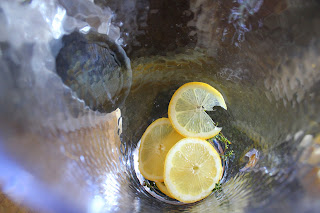
Remove the tea bags and leave the tea sitting out so that it can cool down a bit. Once the tea has stopped steaming, it's ready to combine with the thyme and lemon. Place the thyme sprigs and lemon slices in the bottom of your pitcher.
(You will notice that in this picture it appears that I have more than five sprigs of thyme. That is because I grow my own thyme and it's been kinda hurtin' lately, so I had to add a lot more to get the same flavor as one would get from five sprigs of store-bought, or heathly homegrown thyme. Pay no mind.)
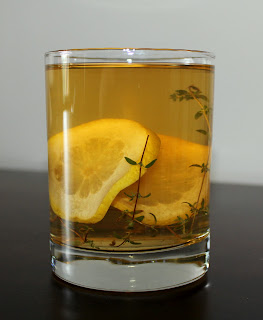
Pour the warm tea over the thyme and lemon and place the pitcher in the fridge to cool the rest of the way. This will take several hours but it's well worth the wait!
When it's completely cooled, pour over ice (or don't) and enjoy! Salute!
Thursday, April 05, 2012
A Challenge: Ombre Cake
Both of the words in the title of this post were a challenge for me. "Cake" because I am sooo not a baker (hence the fact that I'm using a cake mix out of a box!) and "ombre" because it took a lot of planning and testing to figure out the right coloring to create that effect. I think I succeeded at this callenge, though, because both the cake and the coloring turned out pretty well, if I do say so myself.
I found this idea on Pinterest, and of course it was pinned from another blog. The blog didn't give very good directions though and proved to be pretty much unhelpful, so I had to figure it out more or less on my own. I used the picture and the basic description on the blog as the basis and went from there, and decided to make my life easier by using a box cake mix instead of making the cake from scratch like the blogger did.
My friend Lauren and I were hosting a St. Patty's Day brunch and wanted to have a cake to celebrate our neighbor (and friend - or "freibor" as she likes to call us) Joanna's birthday, which was the following week. I thought this cake would be a great idea because I could make the inside green for St. Patty's Day and have "Happy Birthday" on the top. The best of both worlds!
I used green food coloring because it was St. Patty's Day, but you could use any color you want. You could even skip the ombre and do different pastels for Easter this weekend, like blue, green, yellow, and pink. If you were to do that, you would probably just use the same number drops of food coloring for each color instead of varying them as we will do in the ombre recipe.
No, I am not a baker, and yes, I did use a store-bought cake mix for this recipe, but I made it my own by adding the almond extract and using light olive oil instead of vegetable oil. So it'll be a little more special than just plain old box cake mix.
OK, let's get... bakin'?
Ombre Cake
Servings: However many can eat a 4 layer round cake. Could be 8... could be 1. If it's 1, don't worry - I won't judge you ;-)
Cooking time: 20-25 minutes
Prep time: about 45 minutes
Ingredients:
2 boxes white cake mix - I used Betty Crocker Super Moist, so the eggs, water, and oil measurements are based on this. If you use a different brand, follow the directions on the back for that
6 egg whites
2 1/2 cups water
2/3 cup light olive oil
2 tablespoons almond extract
Food coloring of your choice (I used green). Measurements to follow in recipe
2 tablespoons butter
2 containers store-bought white icing
Sprinkles of your choosing
Preheat the oven to 350 degrees Fahrenheit.
To start off, grease four round cake pans with butter. Using a paper towel, smear 1/2 tablespoon of butter around the bottoms and sides of each of the four pans.
Prepare each box of the cake mix in a separate bowl, so to begin you're going to be using two bowls. In each bowl, add one box of cake mix, 3 egg whites, 1/3 cup light olive oil, 1 1/4 cup water, and 1 teaspoon almond extract. Using an electrick mixer, beat on low for 30 seconds and then on medium for two minutes, making sure there are no lumps in the batter.
From here, you're going to divide the batter into four separate bowls. You already have two bowls, so you'll need two more. Pour half of each original bowl of batter into a new bowl, leaving you with four bowls each containing 1/4 of the cake batter.
Now we're going to add the food coloring. Arrange the bowls in a line. In the first bowl, add 22 drops of food coloring. In the second bowl, add 15 drops of food coloring. In the third bowl, add 10 drops of food coloring. In the fourth and final bowl, add 5 drops of food coloring.
Starting with the fourth bowl (the one with only five drops of food coloring), stir with a mixer on low for about 30 seconds, until all of the food coloring is evenly incorporated into the batter. Do this to all of the bowls, so next - do the third bowl (the one with 10 drops), followed by the second bowl (the one with 15 drops), and lastly the bowl with 22 drops. (You do it this way so that you're not transferring more color to the other bowls that are supposed to have less color. Make sense?)
Here are the third and fourth bowls:
Transfer the batter from each bowl into each of the four buttered cake pans and place them in the oven (all on a middle rack) to cook for about 20-25 minutes. Start checking them at the 20 minute mark by inserting a toothpick into the center. When the toothpick comes out clean, the cakes are done baking. Remove all four from the oven.
Remove the cakes from the pans, gently, careful not to break any of them. Place the cakes on a cooling rack and let cool completely before frosting.
Frosting the cake:
Once the cakes are cool, cut the rounded topes off of each cake so that they are flat, like this:
Line your cake stand with several small sheets of parchment or wax paper so that they overlap around the edges but don't really cover the center.
Place the darkest colored cake layer in the center of the cake stand. Start by using a knife or icing spatula to dump about 1/3 of the first container of icing onto the top of the first layer of cake. Use the knife to spread the icing in an even layer, not bothering with the sides.
Place the second darkest layer on top of the icing on the first layer. Repeat the icing process. Do this for the following two layers as well.
When you're done with the fourth (and lightest in color) layer, use the knife to spread the remaining 2/3 icing around the side of the cake, evenly. When you're done, run the knife around the top and side of the cake one more time to make sure it's more or less smooth. Last, add sprinkles in any color and way you want.
Remove the parchment/wax paper by slowly and gently tugging on each piece until they come out smoothly. You should have a pretty clean and frosting-free cake stand.
Serve whenever you're ready. I think your guests will be surprised by the ombre colored layers inside the cake once you cut it. Salute!
I found this idea on Pinterest, and of course it was pinned from another blog. The blog didn't give very good directions though and proved to be pretty much unhelpful, so I had to figure it out more or less on my own. I used the picture and the basic description on the blog as the basis and went from there, and decided to make my life easier by using a box cake mix instead of making the cake from scratch like the blogger did.
My friend Lauren and I were hosting a St. Patty's Day brunch and wanted to have a cake to celebrate our neighbor (and friend - or "freibor" as she likes to call us) Joanna's birthday, which was the following week. I thought this cake would be a great idea because I could make the inside green for St. Patty's Day and have "Happy Birthday" on the top. The best of both worlds!
I used green food coloring because it was St. Patty's Day, but you could use any color you want. You could even skip the ombre and do different pastels for Easter this weekend, like blue, green, yellow, and pink. If you were to do that, you would probably just use the same number drops of food coloring for each color instead of varying them as we will do in the ombre recipe.
No, I am not a baker, and yes, I did use a store-bought cake mix for this recipe, but I made it my own by adding the almond extract and using light olive oil instead of vegetable oil. So it'll be a little more special than just plain old box cake mix.
OK, let's get... bakin'?
Ombre Cake
Servings: However many can eat a 4 layer round cake. Could be 8... could be 1. If it's 1, don't worry - I won't judge you ;-)
Cooking time: 20-25 minutes
Prep time: about 45 minutes
Ingredients:
2 boxes white cake mix - I used Betty Crocker Super Moist, so the eggs, water, and oil measurements are based on this. If you use a different brand, follow the directions on the back for that
6 egg whites
2 1/2 cups water
2/3 cup light olive oil
2 tablespoons almond extract
Food coloring of your choice (I used green). Measurements to follow in recipe
2 tablespoons butter
2 containers store-bought white icing
Sprinkles of your choosing
Preheat the oven to 350 degrees Fahrenheit.
To start off, grease four round cake pans with butter. Using a paper towel, smear 1/2 tablespoon of butter around the bottoms and sides of each of the four pans.
Prepare each box of the cake mix in a separate bowl, so to begin you're going to be using two bowls. In each bowl, add one box of cake mix, 3 egg whites, 1/3 cup light olive oil, 1 1/4 cup water, and 1 teaspoon almond extract. Using an electrick mixer, beat on low for 30 seconds and then on medium for two minutes, making sure there are no lumps in the batter.
From here, you're going to divide the batter into four separate bowls. You already have two bowls, so you'll need two more. Pour half of each original bowl of batter into a new bowl, leaving you with four bowls each containing 1/4 of the cake batter.
Now we're going to add the food coloring. Arrange the bowls in a line. In the first bowl, add 22 drops of food coloring. In the second bowl, add 15 drops of food coloring. In the third bowl, add 10 drops of food coloring. In the fourth and final bowl, add 5 drops of food coloring.
Starting with the fourth bowl (the one with only five drops of food coloring), stir with a mixer on low for about 30 seconds, until all of the food coloring is evenly incorporated into the batter. Do this to all of the bowls, so next - do the third bowl (the one with 10 drops), followed by the second bowl (the one with 15 drops), and lastly the bowl with 22 drops. (You do it this way so that you're not transferring more color to the other bowls that are supposed to have less color. Make sense?)
Here are the third and fourth bowls:
Transfer the batter from each bowl into each of the four buttered cake pans and place them in the oven (all on a middle rack) to cook for about 20-25 minutes. Start checking them at the 20 minute mark by inserting a toothpick into the center. When the toothpick comes out clean, the cakes are done baking. Remove all four from the oven.
Remove the cakes from the pans, gently, careful not to break any of them. Place the cakes on a cooling rack and let cool completely before frosting.
Frosting the cake:
Once the cakes are cool, cut the rounded topes off of each cake so that they are flat, like this:
Line your cake stand with several small sheets of parchment or wax paper so that they overlap around the edges but don't really cover the center.
Place the darkest colored cake layer in the center of the cake stand. Start by using a knife or icing spatula to dump about 1/3 of the first container of icing onto the top of the first layer of cake. Use the knife to spread the icing in an even layer, not bothering with the sides.
Place the second darkest layer on top of the icing on the first layer. Repeat the icing process. Do this for the following two layers as well.
When you're done with the fourth (and lightest in color) layer, use the knife to spread the remaining 2/3 icing around the side of the cake, evenly. When you're done, run the knife around the top and side of the cake one more time to make sure it's more or less smooth. Last, add sprinkles in any color and way you want.
Serve whenever you're ready. I think your guests will be surprised by the ombre colored layers inside the cake once you cut it. Salute!
Subscribe to:
Posts (Atom)
