Friday, August 30, 2013

Farmers' Market Figgy Crostini

I'm reviving my Farmers' Market posts from last summer! Well, at least for this one recipe. I know you're excited :-)

The most convenient farmers' market for me to get to is the one nearby my work office. However, it has become inconvenient this year since 1. I have a puppy now and have to get home after work to tend to her, or she gets really annoyed with me, and 2. I take a workout class on the same nights as the farmers' market, so I don't have time to do both. Bummer.squared. But last week we had a week off from the workout class thus I was able to make it to the farmers' market with my farmers' market buddy, Paloma. I went home after work to pick up the pup and met Paloma for some produce perusal. I was very excited and so was Milli, it being her first trip to the FM and all.

I took my old approach of simply walking around the market to see what looked interesting and decided on what recipe to make from there. As we walked our first go-around, I spotted some fruits that looked like very small pears. Paloma informed me that they were figs! I had never seen fresh figs at the farmers' market before, so I kept them in mind as we continued our walk. We came across my favorite bread stand and all of a sudden an idea popped into my head: toast (raisin pumpernickel), cheese, figs! I whipped my head around to the cheese monger across the way and spotted some jars of honey.
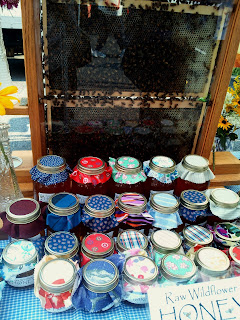
[There were real live bees in there!]

I pictured this crostini spread with goat cheese, which they didn't have, but I thought a nice drizzle of honey would be fantastic on it, so I picked up a small jar of that. Look how cute these little jars are:
I figured the figs and honey would need a little something to cut through the sweetness, so I grabbed a small candy onion from the next stand over (for 35 cents! Gotta love farmers' market prices!). Paloma purchased some ground cherries and we were off!

I stopped by the grocery store for the only thing I didn't find at the market - goat cheese, and then Milli and I were headed home to whip up this delicious crostini for a late night supper. Along with a few ingredients from my own kitchen, the ingredients I got from the market turned into a really scrumptious little treat. I ate two slices of this toast by myself, but I think these would make the perfect party treats. Just slice the toast into one inch x one inch squares and lay them out on a big serving platter. Or, I was thinking that with the sweetness of the figs and honey plus the savory flavor of the goat cheese and onion, this recipe would make for a great brunch dish. Serve alongside a glass of prosecco or champagne and voila - brunch perfection!

Alright, let's get cookin'!

Fig & Goat Cheese Crostini
Servings: 1
Prep time: 10 minutes
Cooking time: 15 minutes

Ingredients:
2 slices of raisin pumpernickel bread
1 small handful whole pecans
2 teaspoons soft goat cheese, plain
1/4 cup balsamic vinegar
1 candy onion (a small sweet or Vidalia onion will do)
1/2 teaspoon fresh cracked black pepper (FCBP)
2 pinches of pumpkin pie seasoning
1 pinch of salt
4 whole figs, trimmed and sliced long-ways


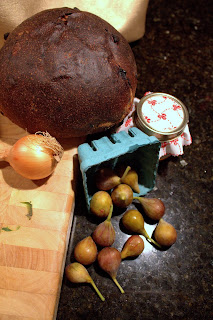
First, a photo of my farmers' market bounty:
OK, now to the recipe.

Let's start with a little prep work. Preheat your broiler or toaster oven so that it's ready when you want to toast your bread. Also, remove the goat cheese from the fridge so that it can soften and be spreadable.

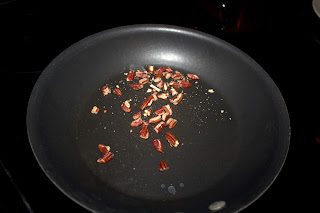
Next, toast your pecans. Place them in a nonstick skillet over medium high heat.
Toss them around the skillet often to prevent them from burning. Cook them for about five minutes and then remove them from the pan. Allow them to cool while you cook the rest of the dish.

Place a small pot on the stove over high heat. Add the balsamic vinegar to the pot. Keep an eye on it while you are cooking your onions and figs. When he vinegar comes to a boil, reduce the heat to low. Stir occasionally while you are finishing up the rest of the dish.
While the vinegar is working, pull the rest of the recipe together.

We are going to use that same nonstick skillet we used for the pecans to cook the onions and figs. Turn your burner on medium-low heat this time.

Since my skillet was already hot (and yours will be too), we want the pan to cool down a bit so that our onions don't burn. Therefore, I put the skillet over a cold burner to start.

Add the EVOO and sliced onions to the skillet while it is situated over the cold burner.
Allow them to warm up. After cooking for two minutes or so, move the skillet to the hot burner (the one you have going at medium-low). Sprinkle in 1/4 teaspoon FCBP, a pinch of pumpkin pie seasoning, and stir.
Let the onions cook for three more minutes and then add the sliced figs.
Sprinkle with another 1/4 teaspoon FCBP, a pinch of pumpkin pie seasoning, and a pinch of salt. Stir.

Let this mixture cook for about five minutes, stirring occasionally.
While the onions and figs are cooking, toast your bread. Stick it in your toaster oven or oven's broiler and leave on the first side until it starts turning a darker brown.
Flip the bread over and let it brown on the other side. This whole process should only take three or four minutes total, so keep a watch on it so the bread doesn't burn.

Remove the bread from the oven when it's nice and toasty.

Also, turn the burner off on the balsamic vinegar reduction and remove the pot from the heat.
Let the reduction cool and it will be slightly thickened. 

Now is a good time to chop your toasted pecans. Place them on your cutting board and run a sharp knife through them several times until you have tiny bits.

Let's assemble our crostini.

Lay your toast on a cutting board or somewhere you don't mind getting messy.

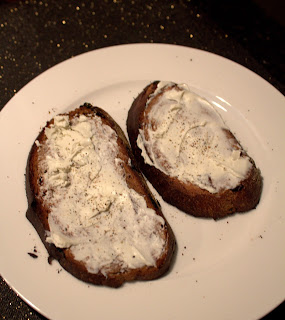
Spread the softened goat cheese over one side of each slice of toast. Sprinkle with FCBP.
Spoon the onion/fig mixture evenly over the goat cheese.
Drizzle with the honey and then the reduced balsamic vinegar glaze. (I just stuck a spoon in each and used that to drizzle.)
Last, sprinkle the chopped nuts on top.
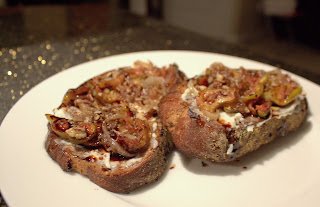
I know they look a tad sloppy, but believe me: they were SO tasty! Salute!
Monday, August 19, 2013

Summertime Tortellini Toss

I invited my dad and his girlfriend to dinner one weekday evening. And not just because I thought they would bring dessert... which they did:
They know me all too well.

But I digress... Back to a more relevant discussion!

When having people over for a meal, I think it's important to tailor your dishes to your guests' preferences and palettes, while still staying true to your own cooking standards. If you aren't familiar with your guests' likes and dislikes, or dietary restrictions, go ahead and ask them ahead of your meal planning. There's nothing worse than spending money, time, and energy preparing a meal and having your guests show up and say they don't eat x, y, or z. As a vegetarian, I know this all too well! I have showed up to many a dinner party or cookout where there was nothing but meat on the menu and of course the hosts feel bad for not knowing or forgetting or what have you. It doesn't hurt to double check before you go all out. With my family, it's easy to know all of this stuff ahead of time. My dad likes hardy foods and his girlfriend likes to eat pretty healthfully. So when I had them over for dinner this time, it was my goal to come up with a meal that would successfully marry those two preferences. And I think I did!

My dad loves Italian food and I usually make him pretty heavy meals (and that means I get to indulge as well!). But with it being mid-August, I wasn't exactly feeling the heavy-sauce-and-cheese-laden Italian foods that I normally go for. I wanted to accommodate what I think his girlfriend would like as well as the August heat and humidity. Ergo, I decided to make something with pasta for my dad (and me, who are we kidding?!), but with some nice, healthy, green veggies and a light sauce. I chose to go with cheese tortellini, which is both hardy and delish, and then picked out some bright green veggies from the produce section: rapini (otherwise known as broccoli rabe), sugar snap peas, and baby spinach. I decided that a light lemon-y white wine sauce would be the perfect complement to the other ingredients.

This is a typical Rachel recipe. I am known for taking random vegetables and throwing them together with some EVOO, garlic, and onion and pulling out a randomly wonderful tasting dish. That type of cooking is what inspired me to start my own food blog in the first place, so I am glad to be sharing this type of recipe with you.

As always, even though this happens to be a vegetarian meal, no one here will judge you for adding some meat protein to it if you want. Perhaps some shrimp would strike your fancy. I would sauté them with some EVOO, S&P, lemon juice, and grated garlic and set them aside. Add them back in maybe two minutes before you add the spinach so that they can warm through. You could even choose to get chicken or sausage stuffed tortellini instead of the cheese tortellini. Whatever you want to do!

And just for fun, here is a gratuitous picture of my little kitchen helper:
OK, let's get cookin'!

Summertime Veggie Tortellini Toss
Servings: 4
Prep time: 15
Cooking time: 20 minutes

Ingredients:
Half of a bunch of broccoli rabe - cleaned, trimmed, and chopped
20 ounce package of cheese tortellini
3 tablespoons EVOO
1/2 large sweet onion
2 cloves garlic
4 teaspoons fresh cracked black pepper (FCBP)
1 1/2 teaspoons salt (grey or kosher)
2 lemons, juiced
1/4 cup chicken or veggie stock
1/4 cup white wine (I used Sauvignon Blanc)
2 handfuls sugar snap peas, cut into thirds
4 large basil leaves, julienned
4 handfuls of baby spinach leaves
Feta cheese crumbles, to taste

Begin by filling a large pot 3/4 of the way with water. Set it on the stove over high heat. When it comes to a boil, add the tortellini, and stir.

Set a kitchen time for the amount of time it says it takes to cook on the back of the package (mine was 7-8 minutes). When the timer goes off, drain the pasta in a colander in your sink and set aside.

Once you have your pasta water set up, start cooking the broccoli rabe.

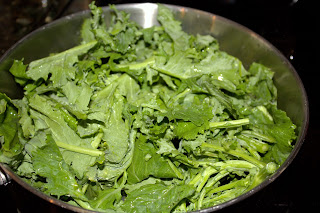
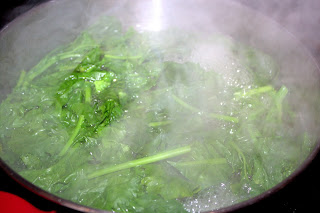
Broccoli rabe can be very bitter tasting, so to cook out some of that bitterness, you boil it. Use a pan with high sides for this. Fill the pan about halfway full with water and set it on the stove over medium-high heat. Add the broccoli rabe.
Place the lid on your pot and let the rabe cook until it starts to soften and wilt.
Cook it for a total of 5 minutes, from the time you stick it in the pan until you drain it.

Place a colander in the sink and pour the water and rabe into it to drain. Set aside.

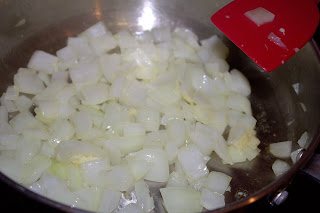
Put the pan back on the stove, over medium-low heat this time. Drizzle in the EVOO. Add the chopped onions and grate the garlic on top of them.
Sprinkle in a 1/2 teaspoon of salt and one teaspoon FCBP. Let cook for about five minutes, stirring regularly so that nothing sticks to the bottom of the pan.

When the onions are softened and translucent, add your liquids: the lemon juice, chicken stock, and white wine. Stir.

Directly after adding the liquids, throw in the sugar snap peas.
Let cook for one minute, then add the broccoli rabe to the pan, as well as the basil. Stir.

Finally, add the spinach leaves. Place them on the top of your other veggies...
... and then stir well so that they are combined with the sauce. Mix in another teaspoon of FCBP and 1/2 teaspoon salt. Allow to cook so the spinach leaves wilt.

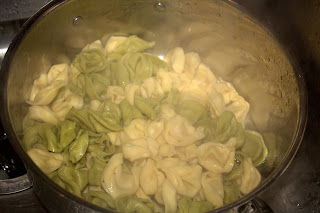
While the spinach is wilting, prepare your tortellini. Place the pasta back in the pot in which you cooked them.
Add two teaspoons FCBP, 1/2 teaspoon salt, and one teaspoon of EVOO. Stir.
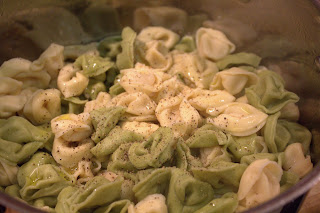
Once the spinach has fully wilted, immediately pour the veggie mixture into the same pot as your tortellini. Toss it all together to coat the pasta in the sauce.

Pour the tortellini & veggies into your serving dish. Sprinkle with feta cheese - as much or as little as you prefer.
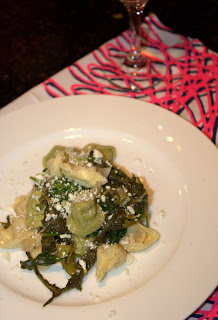
Scoop some of the pasta & veggies onto your dinner plate.
Serve with a glass of the white wine you cooked with, and enjoy. Salute!

Monday, August 12, 2013

Mediterranean Quinoa

Every now and again, I like to make a big, blowout, vegetarian meal for myself. Something only I will be eating and one that will leave me with leftovers for days to come. That is the type of recipe I am going to be sharing with you today, so strap in.

As you know, I like to take inspiration from meals I've eaten at restaurants, and the week prior to making this recipe, I had a lovely Mediterranean meal with my friend Paloma at my neighborhood Lebanese restaurant. We shared a fatayer, which was a pita stuffed with spinach, onions, and feta, and then pressed like a panini so that the outside became all crisp. Delish! We also shared a "pitza," which, you may guess, was a pita topped with pureed eggplant, sliced tomatoes, slices of eggplant, kalamata olives, feta, and oregano. SO good! (We also each had a slice of cake, but that's besides the point...) After all of this delicious food, I was inspired to use some of the same components from the Lebanese dishes to make my own Mediterranean meal. I put my own twist on it by adding a few more choice ingredients, changed up the final dish from a pitza or fatayer to a veggie/quinoa mash-up, and was very pleased with the outcome.

This is a pretty healthy meal, which is just a bonus to how great it tastes. Quinoa really helps to kick up the nutritional value, but if you don't want to use quinoa, you could use couscous. I even thought of doing half couscous and half quinoa, but by the time that idea occurred to me, I had already started cooking the whole cup of quinoa. If you wanted to do half and half, you would just make a half a cup each of the couscous and quinoa and mix them in at the end. And if none of these options appeal to you, there's always rice!

Just because I made this as a vegetarian blowout meal, doesn't mean you can't add meat to it if you want. I would probably use chicken. Dress it simply with some EVOO, salt & pepper, grill it, let it rest, slice it up, and then set it atop a mound of quinoa & veggies. OR you could shred it and really mix it in with the rest of the dish. Take your pick.

Let's get cookin'!


Mediterranean Veggies with Quinoa
Servings: 4
Prep time: 10 minutes
Cooking time: 25 minutes

Ingredients:
1 cup dry quinoa
1 cup water
1 cup vegetable or chicken stock
4 tablespoons extra virgin olive oil (EVOO)
10 ounces of cherry tomatoes, whole
2 cloves garlic
1/2 yellow onion, chopped
2 teaspoons fresh cracked black pepper (FCBP)
1/4 teaspoon dried oregano
1 teaspoon salt (grey or kosher)
1/8 teaspoon red pepper flakes
4 tablespoons balsamic vinegar
1/2 cup dry white wine (like a Chardonnay)
8 ounces garbanzo beans (chick peas)
2 cups sliced button mushrooms
1 baby eggplant, skinned & diced
Juice of one lemon
4 tablespoons chopped parsley
4 large basil leaves, julienned
3 large handfuls of baby spinach leaves
1 handful pinoli (pine nuts)
Finely crumbled feta cheese for garnish (to taste)

Place a medium sized pot on the stove over high heat. Add the dry quinoa, stock, and water.
Bring to a boil. Stir and reduce heat to low. Place a lid over the pot and set a timer for 15 minutes.

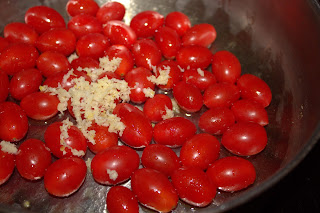
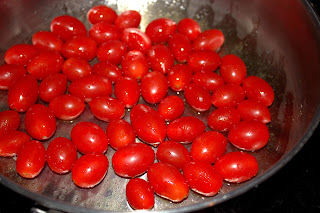
Set a pan with high sides or a Dutch oven on the stove over medium heat. Drizzle in four tablespoons of EVOO. Add the cherry tomatoes and shake the pan to roll the tomatoes around in the oil.
Grate both cloves of garlic over the tomatoes and use a spatula to toss them in the garlic.
Place a lid on the pan and let cook for about five minutes, shaking the pan occasionally so that the tomatoes and garlic don't burn.

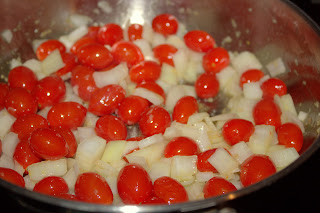
Remove the lid and add the chopped onion. Stir to mix in with the garlic, tomatoes and oil.
Sprinkle the mixture with 1 teaspoon FCBP. Place the lid back on the pot and allow the onions to sweat out for about five minutes.

Remove the lid and sprinkle the mixture with the salt, oregano, and red pepper flake.

Pour in the balsamic vinegar and dry white wine. Stir.
Allow the wine to cook down for about three minutes.

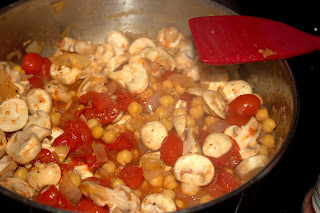
Add the garbanzo beans and place the lid back on the pan. Allow them to steep in the wine for about 5 minutes.
Remove the lid (yet again!) and add the mushrooms.
Place the lid back on and allow the mushrooms to cook down for another five minutes.

Remove the lid and add the eggplant. Drizzle with the lemon juice.
Replace the lid and allow the veggies to cook for ten minutes, stirring occasionally.

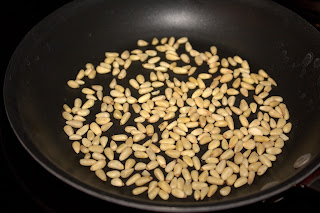
During this time, take the chance to toast your pine nuts. Place them in a non-stick skillet over medium heat.
Keep a close eye on them because they will burn very easily (I definitely burned mine while making this recipe!). Make sure to stir them every 30 seconds or so. They should be done toasting after about five minutes. Remove them from the pan and set them aside to cool.

By the way, when your timer goes off for the quinoa, remove the pan from the heat and fluff the quinoa with a fork.
Replace the lid. Set aside until you are ready to add it to the veggies.
 

Now, go back to those veggies.

Remove the lid and add the parsley and basil. Stir to combine them with the veggies and beans.
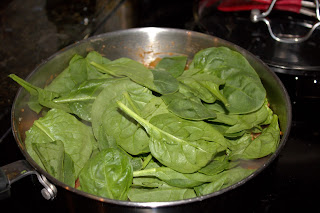
Let them cook for about a minute, then add the spinach leaves. Stir them into the mixture.
Place the lid back on the pot and let the spinach wilt into the rest of the veggies for about three minutes.

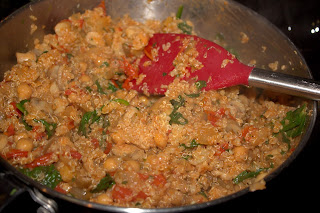
Remove the lid and stir. Take the lid off of the quinoa pot and add the cooked quinoa into the veggies.
Stir well to combine so that the veggies and quinoa are one cohesive dish.
Place a big, heaping spoonful of your veggie/quinoa onto your serving plate. Sprinkle the pine nuts over the top, and then garnish the dish with some extra chopped parsley. Last, sprinkle the crumbled feta on the top.
Serve with a glass of that chardonnay you cooked with and enjoy! Salute!

Wednesday, August 07, 2013

Double Slaw Asian BBQ Sliders

My affection for Asian food is at an all-time high lately. We won't even get into my recent obsession with bubble tea (it's SO fun!). The idea for this recipe was born out of so many things. First of all, I have been dying to try kimchi.  I had a taste of it at a restaurant recently, but that wasn't enough. I knew that my local Harris Teeter carried it in the produce section and therefore I had ready access to it; I just needed to come up with a recipe with which to add it. I've also been seeing a bagillion recipes on Pinterest for barbeque sandwiches that look oh-so-delish! Being that I'm a vegetarian, I don't exactly get to enjoy such recipes. I wanted to think of a way to get the flavor and texture of shredded barbecue by using vegetarian means.  I came up with the idea to use mushrooms, since they are hardy and I could slice them real thin, like shredded meat - sort of. I wanted to include the kimchi in this recipe so I decided to do an Asian barbeque sauce in which to coat the "meat" and throw the kimchi on top of it in the sandwich. Kimchi is spicy though, so I wanted something to even out the spiciness. Regular barbeque sandwiches come with good ol' fashioned coleslaw either on the side or actually in the sandwich, so I figured I would do a coleslaw as well. It's not Asian-inspired, but hey - whatever! It tasted good!

Lastly - the sandwich part. I've been really into sliders lately, and again, the whole vegetarian thing tends to get in the way of a girl enjoying a slider! haha At least out at restaurants - when you make your own food at home, you can make it anyway you like! So instead of a full blown sami, I decided to do this recipe as sliders. Brilliant! I used Hawaiian sweet rolls because that was all my grocery store had that night, but feel free to use regular rolls instead if you prefer.

I don't recall ever having made barbeque sauce from scratch, so I researched the components of Asian barbeque sauce online before making my grocery list. I used this recipe for a base and added my own touches to tailor it to the flavor profile I was going for. I did the same thing with the coleslaw, though I ended up winging my own version instead of following a recipe and it turned out pretty well!

The thing I was most excited about for this recipe was that after looking at the recipe for the Asian bbq sauce, I realized a trip to my local Thai market would be prudent. That is seriously my favorite place to go to look for ingredients. It's like a foreign food wonderland! You never know what you're going to find. Go in with an open mind and heart and you will never leave unsatisfied.

Having said that, I understand that not everyone has a local Thai market located conveniently within their reach, but I think most of these ingredients should be easily found at a typical grocery store's Asian foods aisle.

OK, let's get cookin'!


Asian Inspired BBQ Sliders
Servings: Four mushroom sliders and four chicken sliders
Total time to cook and prepare: About an hour

I began with the coleslaw because you kind of want the flavors to marinate together and for the cabbage and carrots to get slightly softened. You need time on your side for this one.

Cole Slaw

Ingredients:
1/2 small head of cabbage, shredded
1/2 cup shredded carrots
4 tablespoons mayo
2 tablespoons sugar
2 tablespoons rice wine vinegar
1 teaspoon fresh cracked black pepper (FCBP), or to your taste
2 pinches salt

This recipe is pretty simple once you have all of your ingredients prepped, washed, and measured.

Make sure to rinse your shredded cabbage well. Place it in a colander and run cold water over it.
Lay some paper towels on your counter and spread the cabbage over them. Pat dry with more paper towels, then add your dry cabbage to a small bowl.

Add all of the rest of the ingredients to the bowl with your cabbage and stir to combine.
Stick the bowl in the fridge to chill and marinate while you make the rest of the meal.


BBQ Sauce

Ingredients:
6 tablespoons hoisin sauce
2 tablespoons rice vinegar (not seasoned)
1 tablespoon Asian fish sauce
1 tablespoon soy sauce
1 tablespoon agave nectar
1 teaspoon sriracha
2 garlic cloves, minced
1 sprig of sliced lemongrass
1 tablespoon minced fresh ginger root (don't forget to peel before you mince!)
1/8 teaspoon Chinese five-spice powder
1/3 cup sugar
 
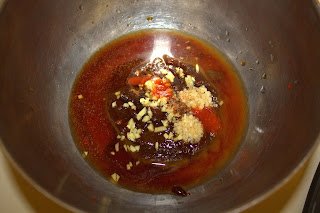
Start by adding all of the ingredients, except the sugar, in a medium sized bowl.
 
Stir to combine.
 
Next, make the caramel base for the sauce. (I had never made caramel before so this was quite the challenge! Pay close attention while you are doing this. Do not multi-task while making the caramel. Trust me.)
 
Place the sugar in a dry, heavy saucepan over moderate heat.  
Cook, undisturbed, until the sugar begins to melt.
Continue to cook, stirring occasionally with a fork, until sugar is melted into a deep golden caramel.
Tilt the pan to one side and carefully pour in the hoisin mixture. The caramel will harden and steam  while you are doing this.

Adjust the temperature to moderately low heat and continue to cook, stirring the entire time, until caramel is dissolved and sauce is thickened - about 6 to 8 minutes.
By the end, your sauce should be more liquid-y.
Remove the pan from the heat and cool the sauce to room temperature. Use this time to make the mushrooms (and/or chicken).
 
P.S. I made more of this sauce the following day and used it to make barbeque chicken on the grill at a cookout. We tried to smother the chicken in the sauce before placing it on the grill - not a good idea. The sauce is SUPER sticky due to the caramel, so it would've been better to drizzle it over the warm chicken as it was grilling. Either way, I was informed that it turned out magnificently and everyone was really impressed. So that's another use for this delicious sauce :-)


Mushrooms (& Chicken)

There are so many varieties of mushrooms and everyone has their favorites. I couldn't decide which kinds of mushrooms to use for this dish, I like them all! My grocery store has them loose so you can choose what you want, so if you're lucky enough to be able to do that, I suggest choosing a few different ones. I did button, shitake, and cremini. The only ones I stayed away from were oyster because I don't think they work in this dish. So feel free to use whichever type you prefer.

Ingredients:
1 chicken breast
2 teaspoons peanut oil
2 teaspoons minced fresh ginger root (don't forget to peel before you mince!)
1 cup sliced mushrooms
1 teaspoons fresh cracked black pepper (FCBP)
1/8 teaspoon Chinese five-spice powder
3/4 cup Asian barbeque sauce

Start by grilling your chicken. We used a Forman grill, but it also works on an outdoor grill (obviously).

Just put the chicken breast on the grill and turn it over when the first side has golden brown grill marks on it.

Remove it from the grill and set it aside to let it rest for five minutes before shredding.
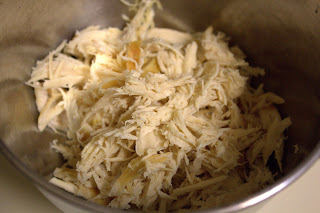
To shred the chicken, use two forks - one to hold the breast in place on your cutting board and the other to tear away at the meat.
Once the entire breast is shredded, place the meat in a small bowl.
 
Pour in about a half a cup of the Asian barbeque sauce and stir to coat the meat in the sauce.

Set aside until you're ready to make your sliders.

Now for the mushrooms!

Place a non-stick skillet over medium heat. Add the peanut oil and the minced ginger.
Allow the ginger to cook for about two minutes. Then add your mushrooms to the pan.
Sprinkle in the FCBP and Chinese five spice and stir.

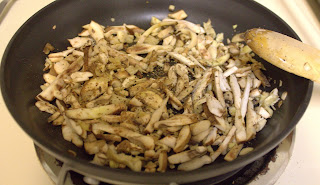
Cook the mushrooms for about ten minutes, stirring occasionally. The mushrooms will cook down quite a bit.

Last, add 1/4 cup Asian barbeque sauce to the pan and stir to coat the mushrooms in the sauce.
Remove the pan from the heat.


Now, let's put it all together!! We are ready to make our sliders! Woot woot!

Sliders

Ingredients:
8 slider rolls
Mushroom mixture
1 chicken breast worth of shredded bbq chicken
Kimchi (to your taste)
About 8 tablespoons of coleslaw

I'm going to show you the chicken and mushroom slider assembly at the same time (even though they are pretty identical...)

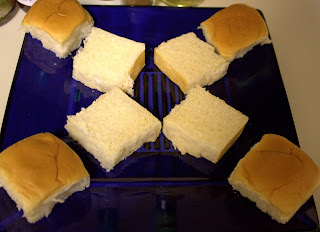
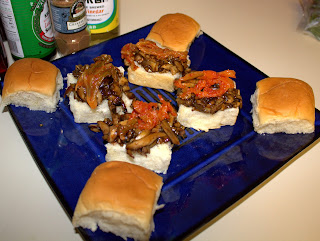
Start by laying out the tops and bottoms of your sliders on a plate, like this:
Next, add a heaping tablespoon of either your mushroom mixture or shredded chicken to the bottom half of each slider bun.
Place a bit of kimchi over the mushrooms or chicken. Kimchi is rather spicy, so add as much or as little as you like.
Now, the coleslaw. Add a heaping spoonful of the coleslaw on top of the kimchi.
 
Lastly, place the top of the slider bun on top of all of the coleslaw.
How delicious do these look?! I am getting so hungry just looking at these babies!
Whip up a batch of my Thai Market Bangers or crack open a cold bottle of Kirin to go along with these little guys and enjoy! Salute!
And FYI - these are really filling! I could only eat three in one sitting, so I saved the fourth for lunch the next day. They taste just as good the following day as they did the first day, so don't be shy about saving one!